Teac AD 500 Service Manual

This is the 84 pages manual for Teac AD 500 Service Manual.
Read or download the pdf for free. If you want to contribute, please upload pdfs to audioservicemanuals.wetransfer.com.

Page: 1 / 84
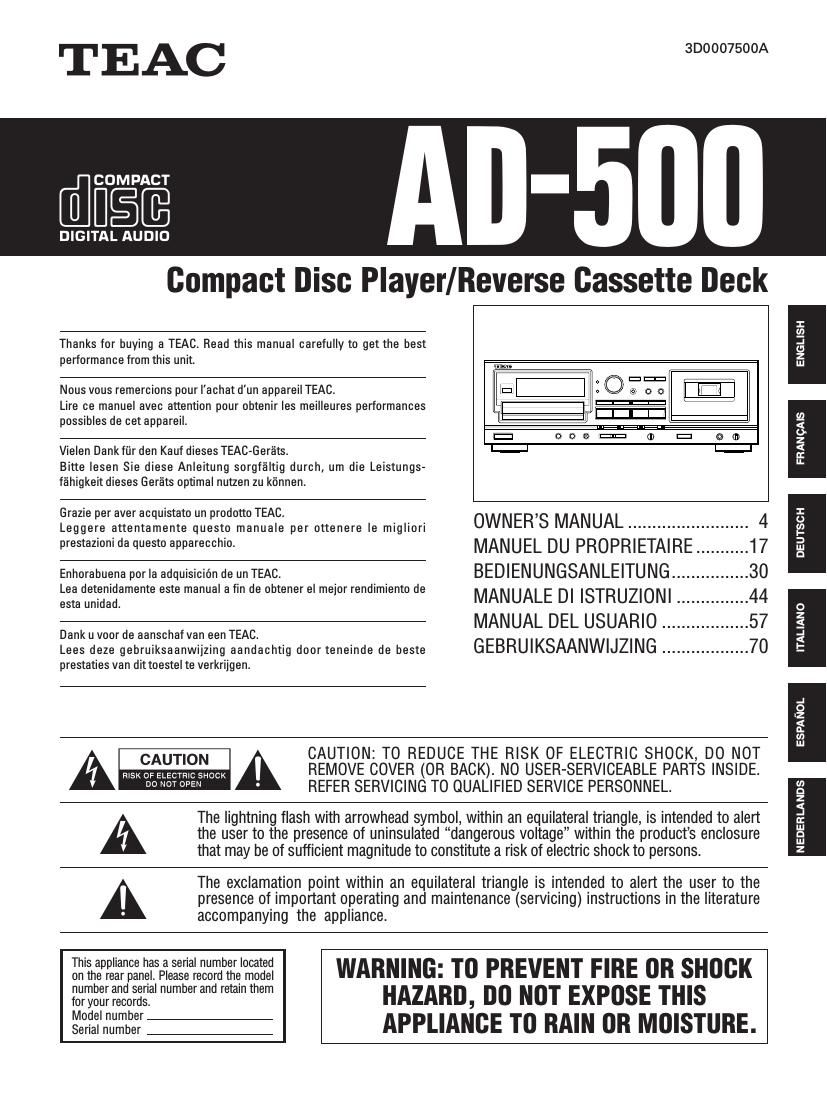
Teac AD 500 Service Manual

Extracted text from Teac AD 500 Service Manual (Ocr-read)


Page 1

_ 2_ IMPORTANT SAFETY INSTRUCTIONS CAUTION:O ORead all of these Instructions.O OSave these Instructions for later use.O OFollow all Warnings and Instructions marked on the audio equipment. 1)Read Instructions - All the safety and operating instructions should be read before the product is operated. 2) Retain Instructions - The safety and operating instructions should be retained for future reference. 3) Heed Warnings - All warnings on the product and in the operating instructions should be adhered to. 4) Follow Instructions - All operating and use instructions should be followed. 5)Cleaning - Unplug this product from the wall outlet before cleaning. Do not use liquid cleaners or aerosol cleaners. Use a damp cloth for cleaning. 6) Attachments - Do not use attachments not recommended by the product manufacturer as they may cause hazards. 7)Water and Moisture - Do not use this product near water _ for example, near a bath tub, wash bowl, kitchen sink, or laundry tub; in a wet basement; or near a swimming pool; and the like. 8)Accessories - Do not place this product on an unstable cart, stand, tripod, bracket, or table. The product may fall, causing serious injury to a child or adult, and serious damage to the product. Use only with a cart, stand, tripod, bracket, or table recommended by the manufacturer, or sold with the product. Any mounting of the product should follow the manufacturers instructions, and should use a mounting accessory recommended by the manufacturer. 9) A product and cart combination should be moved with care. Quick stops, excessive force, and uneven surfaces may cause the product and cart combination to overturn. 10) Ventilation - Slots and openings in the cabinet are provided for ventilation and to ensure reliable operation of the product and to protect it from overheating, and these openings must not be blocked or covered. The openings should never be blocked by placing the product on a bed, sofa, rug, or other similar surface. This product should not be placed in a built-in installation such as a bookcase or rack unless proper ventilation is provided or the manufacturers instructions have been adhered to. 11)Power Sources - This product should be operated only from the type of power source indicated on the marking label. If you are not sure of the type of power supply to your home, consult your product dealer or local power company. For products intended to operate from battery power, or other sources, refer to the operating instructions. 12) Grounding or Polarization - This product may be equipped with a polarized alternating-current line plug (a plug having one blade wider than the other). This plug will fit into the power outlet only one way. This is a safety feature. If you are unable to insert the plug fully into the outlet, try reversing the plug. If the plug should still fail to fit, contact your electrician to replace your obsolete outlet. Do not defeat the safety purpose of the polarized plug. 13)Power-Cord Protection - Power-supply cords should be routed so that they are not likely to be walked on or pinched by items placed upon or against them, paying particular attention to cords at plugs, convenience receptacles, and the point where they exit from the product. 14)Outdoor Antenna Grounding - If an outside antenna or cable system is connected to the product, be sure the antenna or cable system is grounded so as to provide some protection against voltage surges and built-up static charges. Article 810 of the National Electrical Code, ANSI/NFPA 70, provides information with regard to proper grounding of the mast and supporting structure, grounding of the lead-in wire to an antenna discharge unit, size of grounding conductors, location of antenna-discharge unit, connection to grounding electrodes, and requirements for the grounding electrode. "Note to CATV system installer:This reminder is provided to call the CATV system installers attention to Section 820-40 of the NEC which provides guidelines for proper grounding and, in particular, specifies that the cable ground shall be connected to the grounding system of the building, as close to the point of cable entry as practical. ANTENNA LEAD IN WIRE ANTENNA DISCHARGE UNIT (NEC SECTION 810-20) GROUNDING CONDUCTORS (NEC SECTION 810-21) GROUND CLAMPS POWER SERVICE GROUNDING ELECTRODE SYSTEM (NEC ART 250. PART H) NEC - NATIONAL ELECTRICAL CODEELECTRIC SERVICE EQUIPMENT Example of Antenna Grounding as per National Electrical Code, ANSI/NFPA 70 GROUND CLAMP 15) Lightning - For added protection for this product during a lightning storm, or when it is left unattended and unused for long periods of time, unplug it from the wall outlet and disconnect the antenna or cable system. This will prevent damage to the product due to lightning and power-line surges. 16) Power Lines - An outside antenna system should not be located in the vicinity of overhead power lines or other electric light or power circuits, or where it can fall into such power lines or circuits. When installing an outside antenna system, extreme care should be taken to keep from touching such power lines or circuits as contact with them might be fatal. 17) Overloading - Do not overload wall outlets, extension cords, or integral convenience receptacles as this can result in risk of fire or electric shock. 18) Object and Liquid Entry - Never push objects of any kind into this product through openings as they may touch dangerous voltage points or short-out parts that could result in a fire or electric shock. Never spill liquid of any kind on the product. 19)Servicing - Do not attempt to service this product yourself as opening or removing covers may expose you to dangerous voltage or other hazards. Refer all servicing to qualified service personnel. 20) Damage Requiring Service - Unplug this product from the wall outlet and refer servicing to qualified service personnel under the following conditions: a) when the power-supply cord or plug is damaged. b) if liquid has been spilled, or objects have fallen into the product. c) if the product has been exposed to rain or water. d) if the product does not operate normally by following the operating instructions. Adjust only those controls that are covered by the operating instructions as an improper adjustment of other controls may result in damage and will often require extensive work by a qualified technician to restore the product to its normal operation. e) if the product has been dropped or damaged in any way. f ) when the product exhibits a distinct change in performance _ this indicates a need for service. 21) Replacement Parts - When replacement parts are required, be sure the service technician has used replacement parts specified by the manufacturer or have the same characteristics as the original part. Unauthorized substitutions may result in fire, electric shock, or other hazards. 22) Safety Check - Upon completion of any service or repairs to this product, ask the service technician to perform safety checks to determine that the product is in proper operating condition. 23) Wall or Ceiling Mounting - The product should be mounted to a wall or ceiling only as recommended by the manufacturer. 24)Heat - The product should be situated away from heat sources such as radiators, heat registers, stoves, or other products (including amplifiers) that produce heat.

Page 2

_ 3_ SAFETY INFORMATION OCAUTION OACHYUNG OOBSERVERA OADVARSEL This product has been designed and manufactured according to FDA regulations "title 21, CFR, chapter 1, subchapter J, based on the Radiation Control for Health and Safety Act of 1968", and is classified as a class 1 laser product. There is no hazardous invisible laser radiation during operation because invisible laser radiation emitted inside of this product is completely confined in the protective housings. The label required in this regulation is shown 1. OCAUTION-DO NOT REMOVE THE PROTECTIVE HOUSING USING A SCREWDRIVER. -USE OF CONTROLS OR ADJUSTMENTS OR PERFORMANCE OF PROCEDURES OTHER THAN THOSE SPECIFIED HEREIN MAY RESULT IN HAZARDOUS RADIATION EXPOSURE. -IF THIS PRODUCT DEVELOPS TROUBLE, CONTACT YOUR NEAREST QUALIFIED SERVICE PERSONNEL, AND DO NOT USE THE PRODUCT IN ITS DAMAGED STATE. Optical pickup: Type : KSS-212B Manufacturer : SONY Corporation Laser output : Less than 0.4 mW on the objective lens Wavelength : 760_ 800nm 1 THIS LABEL IS ATTACHED TO THE PLACE AS ILLUSTRATED TO INFORM THAT THE APPARATUS CONTAINS A LASER COMPONENT. 1 DIESE AUFKLEBEMARKE IST AN DEM IN DER ABBILDUNG GEZEIGTEN ORT ANGEBRACHT UM DARAUF HINZUWEISEN, DASS IM INNERN DES GERÄTS EINE LASER-KOMPONENTE BEFINDET. 1 PÅSKRIFTEN SITTER PÅ APPARATEN SOM VISAS SOM UPPMANING OM ATT APPARATEN OMFATTAR EN INBYGGD LASERKOMPONENT. 1 DETTE MÆRKAT ER ANBRAGT SOM VIST I ILLUSTRATIONEN FOR AT ADVARE BRUGEREN OM AT APPARATET INDEHOLDER EN LASERKOMPONENT. 2 DETTE MÆRKAT ER SOM VIST PÅ ILLUSTRATIONEN ANBRAGT PÅ INDERSIDEN AF TOPDÆKSLET FOR AT ADVARE BRUGEREN OM AT YDERLIGERE FREMTRÆNGEN VIL VÆRE FORBUNDET MED FARE FOR AT UDSÆTTE SIG FOR LASERSTRÅLING. ADVARSEL - BETJENING AF ANDRE KONTROLLER OG REGULATORER ELLER BENYTTELES AF ANDRE FREMGANGSMÅDER END BESKREVET HERI ER FORBUNDET MED FARE FOR UDSÆTTELSE FOR LASERSTRÅLING. VARING: APPARATEN INNEHÅLLER LASER LOMPONENT MED STRÅLNING ÖVERSTIGANDE KLASS 1. "ADVARSEL: USYNLIG LASERSTRÅLING VED ÅBNING NAR SIKKERHEDSAFBRYDERE ER UDE AF FUNKTION. UNDGÅ UDSAETTELSE FOR STRÅLING" "VAROITUS! SUOJAKOTELOA EI SAA AVATA. LAITE SISÄLTÄÄ LASERDIODIN. JOKA LÄHETTÄ (NÄKYMÄTÖNTÄ) SILMILLE VAARALLISTA LASERSÄTEILYÄ". ADVARSEL: USYNLIG LASERBESTRÅLING NÅR DENNE DELEN ER ÅPEN OG SIKKERHETSSPERREN ER UTKOBLET UNNGÅ UTSETTELSE FOR STRÅLING. CLASS 1 LASER PRODUCT LUOKAN 1 LASERLAITE KLASS 1 LASERAPPARAT CERTIFICATION THIS PRODUCT COMPLIES WITH DHHS RULES 21 CFR SUBCHAPTER J APPLI-CABLE AT DATE OF MANUFACTURETEAC CORPORATION 3-7-3 NAKA-CHO, MUSASHINO-SHI, TOKYO, JAPAN MANUFACTURED TIF For U.S.A. 1 2 CAUTION - INVISIBLE LASER RADIATION WHEN OPEN AND INTERLOCKS DEFEATED. AVOID EXPOSURE TO BEAM. VORSICHT! UNSICHTBARE LASERSTRAHLUNGTRITT AUS. WENN DECKEL GEÖFFNET UND WENN SICHERHEITSVERRIEGELUNG ÜBERBRÜCKT IST. NICHT DEM STRAHL AUSSETZEN ! VARNING - OSYNLIG LASERSTRÅLNING NÄR DENNA DEL ÄR ÖPPNAD OCH SPÄRR ÄR URKOPPLAD. STRÄLEN ÄR FARLIG. ADVARSEL - USYNLIG LASERSTRÅLING VED ÅBNING, NÅR SIKKERHEDSAFBRYDERE ER UDE AF FUNKTION. UNDGÅ UDSÆTTELSE FOR STRÅLING. VAROITUS! SUOJAKOTELOA EI SAA AVATA. LAITE SISÄLTÄÄ LASERDIODIN, JOKA LÄHETTÄÄ (NÄKYMÄTÖNTÄ) SILMILLE VAARALLISTA LASERSÄTEILYÄ. ADVARSEL - USYNLIG LASERBESTRÅLING NÅR DENNE DELEN ER ÅPEN OG SIKKERHETSSPERREN ER UTKOBLET. UNNGÅ UTSETTELSE FOR STRÅLING. 1

Page 50

_ 51_Le cifre del contanastro aumentano se il nastro si sta spostando in avanti, e diminuiscono se il nastro si sta spostando in direzione inversa. Agendo sul tasto COUNTER CLEAR, l'indicazione del contanastro viene riazzerata, ritornando alla posizione "0000". Contanastro Azzeramento del contanastro (COUNTER CLEAR) Livello di registrazione (REC LEVEL)Arresto (STOP) Registrazione (RECORD) Sorgente (SOURCE) Modalità di inversione (REV MODE) Attivazione (POWER)Espulsione (EJECT) Sistema di riduzione del rumore (DOLBY NR) 1.Accendere l'apparecchio portando l'interruttore POWER su ON. 2. Disporre come desiderato l'interruttore della modalità di inversione (REV MODE). O Per una registrazione bidirezionale, posizionare l'interruttore REV MODE su una delle due posizioni π o ø . O Se la registrazione viene avviata per mezzo del tasto ú , la registrazione stessa viene effettuata solo su un lato del nastro. O Se si vuole effettuare la registrazione su un solo lato, disporre l'interruttore REV MODE sulla posizione . 3. Inserire la cassetta sulla quale si vuole registrare. O Verificare che le linguette di sicurezza presenti sul bordo della cassetta siano debitamente in posizione. Se risultano spezzate, per poter di nuovo registrare sulla stessa cassetta è necessario ricoprire i fori lasciati dalle linguette con del nastro adesivo un po' spesso. 4.Agire sull'interruttore SOURCE per selezionare la sorgente desiderata. O Designando come sorgente la posizione "CD", viene automaticamente selezionata l'uscita del lettore CD incorporato nell'apparecchio. Registrazione Nastri di metallo Nastri normali o al cromo fermo. Per riavviare il movimento del nastro è necessario premere lo stesso tasto una seconda volta. O Per arrestare la registrazione premere il tasto STOP. 8. Per avviare la registrazione premere di nuovo il tasto ƒ PAUSE. O Per arrestare temporaneamente la registrazione agire sul tasto ƒ PAUSE. Per riavviare poi il nastro agire di nuovo sullo stesso tasto ƒ PAUSE, o sui tasti di riproduzione o ∏. Se in modalità di pausa della registrazione, premendo il tasto di riproduzione la cui relativa indicazione o ∏ si trova illuminata, la registrazione viene avviata. Se invece si preme il tasto di riproduzione la cui relativa indicazione o ∏ non si trova illuminata, si ottiene solamente il cambiamento di direzione del movimento del nastro, che però rimaneQualsiasi registrazione precedentemente effettuata si cancella automaticamente quando se ne effettua una nuova sullo stesso nastro. In alternativa, il nastro può anche essere cancellato "registradolo" con il comando del livello REC LEVEL posto a "0". AVVERTENZALa duplicazione di nastri già registrati, di dischi, o di altro materiale pubblicato o trasmesso via radio può costituire una violazione delle leggi sui diritti d'autore. Verificare attentamente le leggi relative prima della registrazione. Cancellazione del nastro ITALIANO 4. Selezionare la posizione desiderata per il sistema di riduzione del rumore DOLBY NR. 5.Agire sui tasti o ∏ per avviare la riproduzione. 6.Regolare il volume per mezzo dell'apposito comando dell'amplifi- catore. O Per arrestare la riproduzione, premere il tasto STOP. O Designando come sorgente la posizione "LINE", viene selezionato come sorgente il segnale che giunge ai terminali di ingresso 'LINE IN". 5. Selezionare la posizione desiderata per il sistema di riduzione del rumore DOLBY NR. 6. Premere il tasto RECORD. Il deck passa alla modalità di pausa della registrazione (con le indicazioni REC e ƒilluminate). 7.Regolare il livello di registrazione per mezzo del comando REC LEVEL, ed in modo che il più forte suono da registrare faccia raggiungere al misuratore di livello appena brevemente la zona intorno al punto "0 dB" (per i nastri normali o al cromo) o intorno al punto "3 dB" (per i nastri di metallo).

Page 54

_ 55_ Le operazioni per la diagnostica di eventuali problemi insorti nel funzionamento di questo apparecchio sono simili a quelle che si effettuano per qualsiasi altra apparecchiatura elettrica o elettronica. Controllare per prime sempre le cause più probabili ed ovvie. Qui di seguito si indicano alcuni dei principali problemi e la loro possibile soluzione. Diagnostica ITALIANO Problema Probabile causa Rimedio Generalità L'apparecchio non si La spina del cavo di alimentazione non Provvedere. accende, anche premendo è inserita ben a fondo nella presa di il tasto POWER. corrente di rete. Ronzii. Le spine dei cavi di collegamento non sono Controllare o rifare i collegamenti. collegate ben a fondo nelle rispettive prese. Disturbi nel sintonizzatore. Apparecchio troppo vicino al Tenere l'apparecchio ed il sintonizzatore sintonizzatore. ad una distanza ragionevole, o spegnere questo apparecchio quando si ascolta la radio. Nessun suono. I collegamenti al sistema stereo Controllare e provvedere. non sono corretti. Non si riesce a utilizzare il L'interruttore POWER si trova su OFF. Portarlo su ON. telecomando. Telecomando senza batterie, o con batterie Inserire le batterie, o sostituirle, esaurite. secondo il caso. Lettore CD Non si riesce a riprodurre Disco inserito con l'etichetta rivolta Inserirlo con l'etichetta rivolta il disco inserito. verso il basso. verso l'alto. Disco sporco. Ripulirne la superficie. Nessun suono. I collegamenti al sistema stereo Controllare e provvedere. non sono corretti. Nessuna uscita dal CD. Il deck a cassette si trova in modalità Fermare il deck, o collegare l'uscita di riproduzione. del CD all'amplificatore. Si riesce a riprodurre solo Il tasto SINGLE si trova inserito. Premerlo per disattivarlo. un brano. Riproduzione programmata Non è stato premuto il tasto PROGRAM. Premere il tasto. L'indicazione PGM impossibile. deve comparire sul quadrante. Salti nel suono Il lettore si trova soggetto a urti o Posizionare il lettore in un luogo non (allineamento non preciso). vibrazioni. soggetto a urti o vibrazioni. Disco sporco. Ripulirne la superficie. Deck a cassette Suono di qualità scadente. Le testine sono sporche. Ripulirle. Le testine sono magnetizzate. Smagnetizzarle con il dispositivo TEAC E-3. La posizione dell'interruttore di riduzione Modificarla in modo appropriato. del rumore DOLBY NR non è quella corretta. Suoni strani. Il comando dell'altezza è stato modificato. Riportare il punto del comando dell'altezza sulla posizione centrale. Registrazione impossibile. Le linguette della cassetta per la protezione Ricoprirne i fori con del nastro dalle cancellazioni accidentali sono spezzate. adesivo un po' spesso. Le testine sono sporche. Ripulirle. Il livello di registrazione è troppo basso. Alzarlo, ruotando la manopola verso destra.

Page 74

_ 75_ De herhaalfunktie dient voor het herhalen van een enkel muziekstuk, de gehele compact disc of een gedeelte van de disc tussen twee door u gekozen punten (beginpunt en eindpunt). O Voor het uitschakelen van de herhaalfunktie drukt u nogmaals op de REPEAT 1/ALL toets. ∑ Herhalen van een enkel muziekstuk (REPEAT 1 - enkele herhaalfunktie) 1. Druk op de REPEAT 1/ALL toets. In het uitleesvenster lichten de "REPEAT" en "SINGLE" indikators op. 2.Kies met de Ú of Æ toets het muziekstuk dat u wilt herhalen. Het gekozen muziekstuk wordt weergegeven, aan het eind ervan gaat de CD-speler terug naar het begin van het muziekstuk en dan begint de weergave opnieuw. Zo zal het gekozen muziekstuk meermalen achtereen worden afgespeeld. ∑ Herhalen van een gehele compact disc (REPEAT ALL - volledige herhaalfunktie) 1.Druk tweemaal op de REPEAT 1/ALL toets. In het uitleesvenster lichten de "REPEAT" en "ALL" indikators op. 2. Druk op de PLAY weergavetoets. De compact disc wordt nu in zijn geheel weergegeven, aan het eind ervan gaat de CD-speler helemaal terug naar het begin van het eerste muziekstuk om daar opnieuw te beginnen en zo wordt de gehele CD herhaaldelijk weerge- geven. ∑ Herhalen van een door u gekozen gedeelte (REPEAT A-B herhaalfunktie) 1.Start de weergave vanaf elk gewenst punt vóór het te herhalen gedeelte. 2.Kies het punt van waaraf u de weergave wilt herhalen (beginpunt A) en druk daar op de A-B toets. In het uitleesvenster lichten de "REPEAT" en "A-" indikators op en gaat de "B" indikator knipperen om aan te geven dat punt A in het geheugen is vastgelegd. 3.Wanneer het eindpunt van het te herhalen gedeelte wordt bereikt, drukt u nogmaals op de A-B toets om punt B vast te leggen. Nu stopt de "B" indikator met knipperen en blijft branden om aan te geven dat de A-B herhaalfunktie is ingeschakeld. De CD-speler keert nu automatisch naar punt A terug en begint daar weer met weergave. Bij het opnieuw bereiken van punt B keert de CD-speler weer terug naar punt A en zo blijft dit zich herhalen. O Na het vastleggen van beginpunt A kunt u het eindpunt B ook sneller opzoeken met de Ò of Æ toets, in plaats van te wachten tot het punt met de normale weergave wordt bereikt. O Druk tijdens de A-B weergave nogmaals op de A-B toets om deze herhaalfunktie uit te schakelen. ∑ Herhalen van de gepro- grammeerde weergave U kunt de herhaalfunktie ook inschakelen tijdens geprogrammeerde weergave. Om alle geprogrammeerde muziekstukken te herhalen, drukt u tweemaal op de REPEAT 1/ALL toets. (Kontroleer of hierbij de "REPEAT" en "ALL" indikators oplichten in het uitleesvenster.) Herhaalfunktie 1.Druk in de stopstand op de SHUFFLE toets. In het uitleesvenster licht de SHUFFLE indikator op. 2. Druk op de CD PLAY weergavetoets. Alle muziekstukken op de compact disc worden nu in willekeurige volgorde weergegeven. O Druk tijdens de willekeurige weergavefunktie op de Æ toets om willekeurig een ander muziekstuk in te stellen. Druk op de Ú toets om het spelende muziekstuk weer vanaf het begin weer te geven. O Een muziekstuk kan na weergave niet met deze funktie worden herhaald. O Druk tijdens willekeurige weergave nogmaals op de SHUFFLE toets om de willekeurige weergavefunktie te annuleren. De muziekstukken worden vanaf het spelende muziekstuk in hun normale volgorde weergegeven. Afspelen in willekeurige volgorde Eindpunt B Beginpunt A Muziekstuk Muziekstuk Geprogrammeerde muziekstukken NEDERLANDS