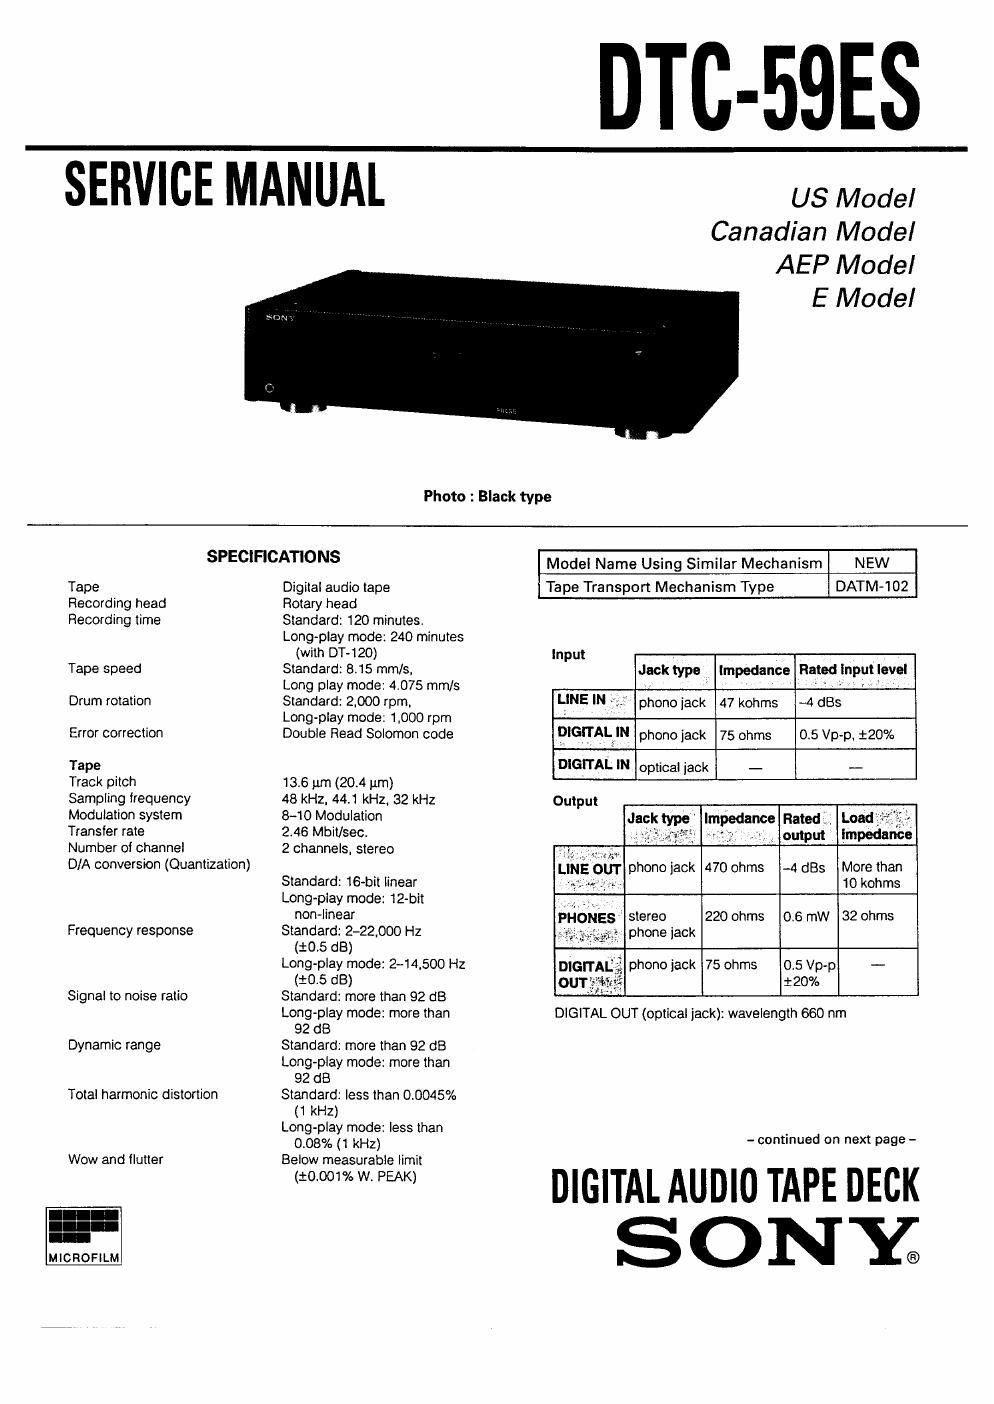
Sony dtc 59 es service manual
This is the 37 pages manual for sony dtc 59 es service manual.
Read or download the pdf for free. If you want to contribute, please upload pdfs to audioservicemanuals.wetransfer.com.
Extracted text from sony dtc 59 es service manual (Ocr-read)
Page 1
DTC-59ES
SERVICE MANUAL _
US Model
Canadian Model
AEP Model
E Model
Photo : Black type
SPECIFICATIONS
Tape
Recording head
Recording time
Tape speed
Drum rotation
Error correction
Tape
Track pitch
Sampling frequency
Modulation system
Transfer rate
Number of channel
D/A conversion (Quantization)
Frequency response
Signal to noise ratio
Dynamic range
Total harmonic distortion
Wow and llutter
--
--
.-
MICROFILM
Digital audio tape
Rotary head
Standard: 120 minutes,
Long-play mode: 240 minutes
(with DT-120)
Standard: 8.15 mm/s.
Long play mode: 4.075 mm/s
Standard: 2,000 rpm.
Long-play mode: 1,000 rpm
Double Read Solomon code
136 pm (204 um)
48 kHz, 44.1 kHz. 32 kHz
8-10 Modulation
2.46 Mbit/sec.
2 channels. stereo
Standard: 16bit linear
Long-play mode: 12-bit
non-linear
Standard: 242,000 Hz
(:05 dB)
Long-play mode: 2-14.500 Hz
(105 dB)
Standard: more than 92 dB
Long-play mode: more than
92 GB
Standard: more than 92 dB
Long
Standard: less than 0.0045%
(1 kHz)
Long-play mode: less than
0.08% (1 kHz)
Below measurable limit
(10.00% w. PEAK)
Model Name Using Similar Mechanism NEW
Tape Transport Mechanism Type DATM-102
Input .
Jack type Impedance Rated Input level
LINEN"? phonoiack 47kohms ~4st
PIGITALJN phono jack 75 ohms 0.5 Vp-p, 120%
DIGITAL IN optical jack - "'
Output
Jacktype Impedance Ratedi.
» , output
' $2..
LINE tau-r phone jack 470 ohms -4 am More than
~i 10 kohms
stereo 220 ohms 0.6 mw 32 ohms
phone jack
phone jack 75 ohms 0.5 Vp»p -
140%
DIGITAL OUT (optical lack): wavelength 660 nm
- continued on next page -
DIGITAL AUDIO TAPE DECK
SONY.
Page 2
.4
v'DJ 2-}
General
Power requirements 120V AC, 60H: : US. Canadian model
220-230V AC. 50/60Hz : AEP model
110-120, 220-240V AC, 50/60Hz : E model
Power consumption 32 W
Dimensions Approx, 470 x 110 x 350 mm
(w/h/dl
(18 5),, x 4 3/s x 13 7/5 inches)
Weight Approx. 6.6 kg (14 lb 10 02)
Remote commander (supplied)
Remote control system Infrared control
Power requirements 3V DC, with two size AA (R6)
batteries
Dimensions Approx. 63 x 19 x 175 mm
(w/h/d)
(2 I, x I, x 7 inches)
Weight Approx, 130 g (4 oz) incl,
batteries.
Supplied accessories
Sony batteries SUM-3(NS) (2)
Audio connecting cords (2 phone plugs - 2 phone plugs,
stereo for line inputs and outputs) (2)
Screws (4)
Design and specifications are subject to change without
notice.
SAFETYvRELATED COMPONENT WARNINGI!
COMPONENTS IDENTIFIED BY MARK A OR DOTTED LINE
WITH MARK A ON THE SCHEMATIC DIAGRAMS AND IN
THE PARTS LIST ARE CRITICAL TO SAFE OPERATION. REPLACE
THESE COMPONENTS WITH SONY PARTS WHOSE PART
NUMBERS APPEAR AS SHOWN IN THIS MANUAL OR IN
SUPPLEMENTS PUBLISHED BY SONV.
ATTENTION Au COMPOSANT AYANT RAPPORT
A LA sEcURITEI
LEs COMPOSANTS IDENTIFIES PAR UNE MAROUE A: SUR
LEs DIAGRAMMES SCHEMATIoUEs ET LA LISTE DES PIECES
SONT CRITIQUES POUR LA sEcumTE DE FONCTIONNE-
MENT. NE REMPLACER SES COMPOSANTS QUE PAR DES
PIECES SONY DONT LES NUMEROS SONT DONNES DANS
c5 MANUEL ou DANS LEs SUPPLEMENTS PUBLIEs PAH
SONY.
TABLE OF CONTENTS
5mm EtLe £399
1. GENERAL
Features ................................................................... 4
Location and Function of Controls ............................ 5
Clock Setting ............................................................ 9
2. DISASSEMBLY ........................................... 10
3. ADJUSTMENTS
3-1. Electrical Adjustments .................................... 15
3-2. Checks for Date Function ............................... 17
4. DIAGRAMS
4-1. Circuit Boards Location ............ 18
4-2. Block Diagram. . 19
4-3. Waveforms ...... 22
4-4. Semiconductor Lead Layouts ............. . 25
4-5. Schematic Diagram
- MD / Power Supply/ Display Section ~ . 27
4-6. Printed Wiring Boards
- MD / Power Supply / Display Section - ........ 31
4-7. Printed Wiring Boards
- Main Section - .............................................. 35
4-8. Schematic Diagram
- Main Section - .............................................. 39
4-9 IC Block Diagrams .......................................... 43
4-10. Pin Functions .................................................. 46
5. EXPLODED VIEWS
5-1. Cabinet Section .............................................. 55
5-2. Front Panel Section ........................................ 56
53. Chassis Section .............................................. 57
5-4. Mechanism Section 1 ..................................... 58
5-5. Mechanism Section 2 . 59
5-6. Mechanism Section 3 60
5-7. Mechanism Section 4 . 61
6 . ELECTRICAL PARTS LIST ............................ 62
PRECAUTIONS FOR INSPECTIONS AND REPAIR WITH POWER OFF
Before beginning repair work after turning OFF the main switch, be sure to first remove CN932 (EHBP) of the power
board. When assembling the equipment, be sure to plug this connector last.
This is because, even with the main switch turned OFF, electric charges stilt remain in the smoothing capacitor in
the power board. Therefore, if another flexible board is inserted or removed, a terminal of the power supply may
short an adjacent terminal while destroying the device.