Rotel RX 602 OM

This is the 11 pages manual for Rotel RX 602 OM.
Read or download the pdf for free. If you want to contribute, please upload pdfs to audioservicemanuals.wetransfer.com.

Page: 1 / 11
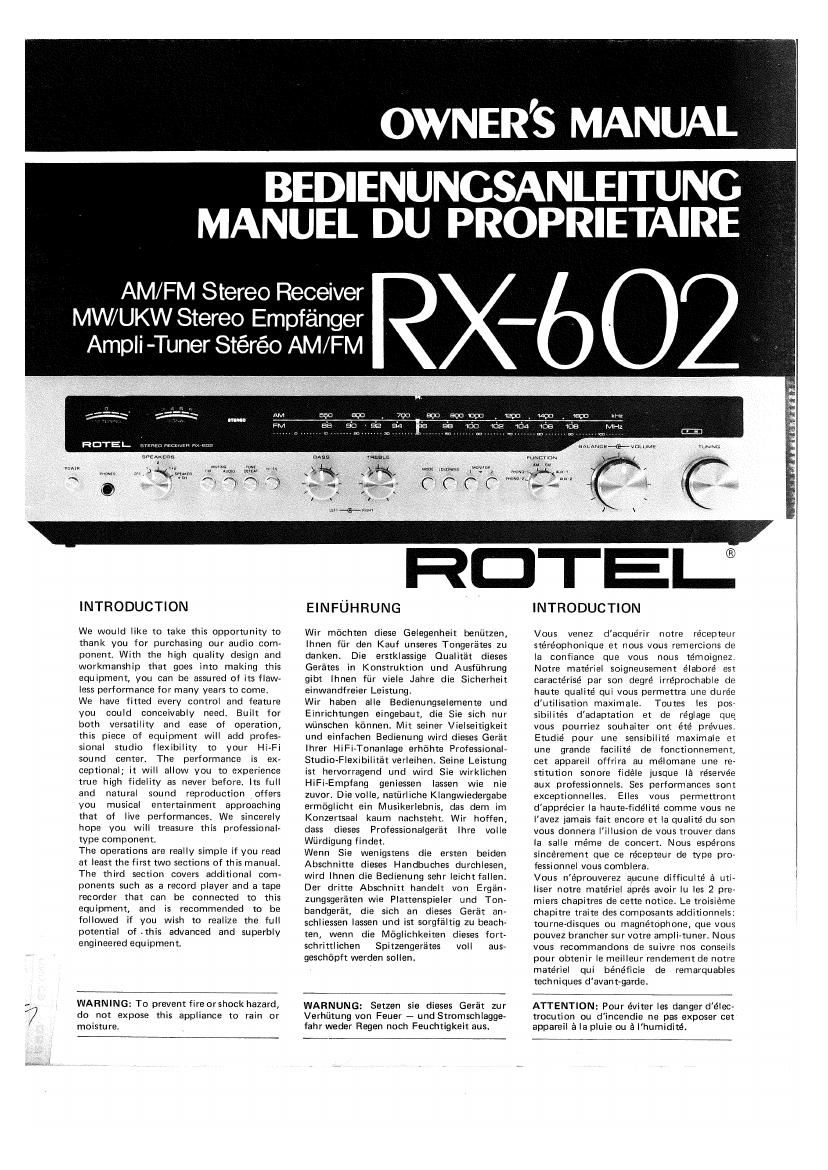
Rotel RX 602 OM

Extracted text from Rotel RX 602 OM (Ocr-read)


Page 1

AM/FM Stereo Receiver

MW/UKW Stereo Empfénger
Ampii -Tuner Stéréo AM/FM

INTRODUCTION

We would iike to take this opportunity to
thank you for purchasing our audio com-
ponent. With the high quality design and
workmanship that goes into making this
equipment, you can be assured of its flaw-
less performance for many years to come.
We have fitted every control and feature
you could conceivably need. Built for
both versatility and ease of operation,
this piece of equipment will add profes-
sionai studio flexibility to your Hi-Fi
sound center. The performance is ex
ceptional; it will allow you to experience
true high fidelity as never before. Its full
and natural sound reproduction offers
you musical entertainment approaching
that of live performances. We sincerely
hope you will treasure this professionalv
type component.

The operations are really simple if you read
at Ieast the first two sections of this manual.
The third section covers additional com-
ponents such as a record player and a tape
recorder that can be connected to this
equipment] and is recommended to be
followed it you wish to realize the Iuli
potential of.this advanced and superbly
engineered equipment.

OWNERS MANUAL

BEDIENUNGSANLEITUNG
MANUEL DU PROPRIETAIRE

Wu .mm mega-k

02

rmécvm

Q C C; C. C "1"an

EINFUHRUNG

Wir mochten diese Gelegenheit beniilzen,
Ihnen Iiir den Kauf unseres Tongar'ates zu
danken. Die erstklassige Qualitat dieses
Ger'etes in Konstruktion und Ausf'uhrung
gibt lhnen liir vlele Jahre die Sicherheit
einwandfteier Leistung.

Wir haben aile Bedienungselemente und
Einrichtungen eingebaut, die Sie sich nur
wtinschen kennen. Mit seiner Vielseitigkeit
und einfachen Bedienung wird dieses Gerat
Ihrer HiFi-Tonaniage erhohte Professionelv
Studio-Flexibililat verieihen. Seine Leistung
ist hervorragend und wird Sie Wirklichen
HiFi~Empfeng geniessen Iassen wie nie
zuvor. Die voila, naturiiche Kiangwiedergabe
ermfiglicht ein Musikerlebnis, das dem im
Konzertsaai kaum nachsteht. Wir hoifen,
dass dieses Professionalgerat lhre voile
Wdrdigung lindet.

Wenn Sie wenigstens die ersten beiden
Abschnitte dieses Handbuches durchlesen,
wird Ihnen die Bedienung sehr leicht fallen.
Der dritte Abschnltt handeit Von Ergan-
zungsgeraten wie Plattenspieler und Ton-
bandgerat, die sich an dieses Gerat an-
schliessen lassen und ist sorgfeltig zu beach-
ten, wenn die Moglichkeiten dieses fort-
schrittlichen Spitzengerétes voll aus-
geschopft werden soilen.

INTRODUCTION

Vous venez d'aequerir notre récepteur
stéréophonique et nous vous remercions de
la confiance que vous nous témoignez.
Notre materiel soigneusement elaboré est
caracterlsé par son degré irreprochable de
haute qualité qui Vous permettra une duree
dutilisation maximaie. Toutes les p057
sibilités dadaptation et de réglage que
vous pourriez souhaiter ont été prevues.
Etudie' pour une sensibilité maximale et
une grande facilité de fonctionnement,
eel appareil Olfrira au me'lcmane une re~
stitution sonore fidele jusdue la réservée
aux professionnels. Ses performances sont
exceptionnelles, Elies vous permettront
dapprécier Ia haute-fide'lité comme vous ne
iavez iamais iait encore et la quaiité du son
vous donnera iiiiusion de votis trouver dans
la saile meme the concert. Nous espérons
sincerement que ce recepteur de type pro-
fessionnei vous comhlera.

Vous n'éprouverez aucune difficuite' a uti-
liser notre matériei apres avoir iu les 2 pre-
miers chapitres de cette notice. Le troisieme
chapitre traite des composants additionnels.
tourne-disques ou magnétophone, que vous
pouvez brancher sur votre ampli-tuner. Nous
vous recommendons de suivre nos conseiis
pour obtenir Ie meilieur rendementde notre
materiel qui béneficie de remarquabies
techniques d'avant-garde.

WARNING: To prevent fireorshock hazard,
do not expose this appliance to rain or
moisture.

WARNUNG: Setzen sie dieses Gerfit zur
Verhiitung von Feuer - und Stromschlagge-
rahr weder Regen noch Feuchtigkeit aus.

ATTENTION: Pour éviter les danger d'élec-
trocution ou d'incendie ne pas exposer cet
appareil a la pluie ou a Ihumidité.

Page 2

INSTALLATION

INSTALLATION

INSTALLATION

sauoion Do not apply power to the tumor
ment houtlirssmakinpsurethatspeakers
are connected properly and that the unit's
VOLUME is set to minimum.

LOCATING THE UNIT

Although the unit normally does not
develape hlgh heat, it should be placed in
such a way that its ventilation system will
not be impeded. Place the unit on a hard
surlace 7 any convenlently located shelr
or table where not ailected by heat. Leave
at least 2 inches is cmi clearance on each
side and in the rest or the unit, and about
3 inches Ia cml above the unit Neyer
directly place an obiect on the ventilation
at the top at the unit, ii there is such a
ventilation

LOCATING SPEAKERS

Counon: Check that each speaker's rated
impedance is 9 ohms or higher, lThe value
should be marked near its cunnecling ter,
minals or indicated in its instruction book
or, it not, consult your dealer.I ll any
speaker is rated at 4 ohms, and it you have
icur speakers. severe dierlaad and distortion
may be incurred when all lour speakers are
played simultaneously In the event you
have speakers rated at 4 ohms, make sure
that only two speakers are played at a time

A, STEREO OPERATION

1. MAIN SPEAKERS 7 Two speakers are
reouired ior stereo operation Place both
speakers against a wall or on a shall so
that they lace your selected Ilstemng
position and are equal distance lront
you. For optimum stereo erlect, they
should be in to IE leer 13 metersi
apart and, il possible, at about car
level heiaht. You may determine best
locations to suit your personal tastes
and listening conditions

REMOTE SPEAKERS 7 It you wish to
enioy stereo sound in another room in
your home, you can connect a palr or
speakers to the SPEAKER 2 terminals
located on the unIt's rear panel Though
you wiil need long cables between the
unit and the speakers in another room.
make sure they are not longer than 50 to
so leet I15 to 20 metersi in length and
that they are oi heavy duty type in order
to prevent loss ol volume

FaIIcw the procedure described aboye in
the item Ill lot placlng the remote
speakers.

.N

B. SIMULATED 4-CHANNEL OPER-
ATION

Four speakers are reoulred to be set in one
room lor this slmulated 4-chsrlneI operation
made possible by use at a special speaker
matrix circuit and turn the speaker control
at lront panel to the position SPEAKER
earl.

Place a pair of speakers connected to
SPEAKER 1 terminals in the same manner
as described above in the item III or
STEREO OPERATION section, They will
be reierred to as the FRONT speakers.
Placement or the speakers connected to
SPEAKER 2 terminals trelerred to as the
BACK speakersl will vary with your room

Varsicht: Vor dem Ernschaltan des Garates
ist daraul zu schtsn, dass dle Lautsprecher
richtla anaeschlossen rind und dar Lauts
starkaregler (VOLUME) in Mlhimumstelluhg
stent,

AU FSTELLUNG DES GERATES

Ongelch das Gerat normalelweise nichtvial
warms .ntwickslt. sollte as each so out.
gesrelit werdan, dass sein Luttunsssvstam
nichl behindert ist. Zu emplehlen ist Allis
stciluna auf siner hasten Dh-lfllohn, etwa
aul einem passenden RegzI oder Tiseh an
einem nicht ru haitsan art. An baidan
Seitert des Gerates and an seiner Ruckseite
mtissn mindattans 5 on und ulser dam
Gera't etwa s cm lral bleiban. Wenn das
carat cben Liiltunasollnunaen has, dtirlan
drese nicnt durclt uninittelbar darsul
gestellte Geaenstande verdeckt werden.

AUFSTE LLUNG DER

LAUTWRECHER

Varsieh . Es ist darduf zu achtsn, dass die
Neiinimpedantiedeseinzelnen Lautsprechers
mindestens 3 ohm batrapt Ioer Impedanz-
wert sollte in der Nahe des Anschlusses am
Lautsprecher selbst rider in desssn sedie-
nungsanwslsung vermcrks sein; wenn nicht,
rraaen SlE Ihren Handler.) llllann iraendainsr
der Lautsprecher nur 4 Ohm hot urtd yler
Lautsprecher anaeschloeeen sind, kann bei
plaichzaitiaem Betnab derselben schwere
uberlastung und Verzerrunp aultreran
Wenn Sie Lautsprechermit 40hm Impedanz
haben. achten Sie daraul, dass nur rwel
glaichzeitia betrleben weroen.

A. STEREOBETRIEB

I. HAUPTrLAUTSPRECI-IER - Eur Stereo.
betrleb slnd twat Lautspechs arfurders
llch Man slelll diese so an eine Wand
oder aul ein Renal, dass sis nach dsr
oawa'hlten Horpos on reigen und olei.
chen Absrand yon dieset haben clpti»
maler Stereoeltekt wlro mit in 3 bis
Ari/2 m Aostand voneinandar snnahsrnd
in 0hrhohe aulaesteliten Lautsprechern
errielt. Am bestan bastirnmt man die
PIezIerung durch Ausprobleren so, dass
sie dem eioansn Gescnmack und den
Rorbedingungen entspricht.

~

. ZUSATZrLAUTSPRECHER - Wenn Sie
Stereoklana in einem anderen Raum
lhras Heims oeniessen machten, konnen
Sie en Lautsprecherpasr mit den Ans
schiussen SPEAKER 2 an der Riicltseite
oes Gerates yerbinden, Hierzu brauchen
Sie langa Verbindungslsitunpen, die
iedoch hochstens 15720 m lana sein
durfen und zur varmeidung von Liam-
starkeyerlust ausreichend dimensioniert
sein miissen. pa. per Aurstellunp oer
ZuxuurLauksprecher veslahrt man wie
vorstehend unrar i,baschrieben.

B. SIMULIERTER 4-KAMAL-
BETRIEB
Fur diesen sn-nuIierten 4-KallaIerrlEb, der
dutch Anwendung cinar betondsren Laur-
sprechETrMatrlxschaImng ermoplicht wird,
sind vierLautspracharim Raum eriordarlich:
oer Lautsprecherschalter aul der Erontplatte
ist auf SPEAKER 4»CH zu stsllon.
Ein Lautsprecherpaar wird wie oben unter

2

Attention: Avant de brancher vptre materiel

assures yous oue les enceintes soient con-
venablement monteas at due le régIage de
pursssnce soit au minimum.

INSTALLATION DE L'AMFLI-
TUNER

Blen Rue Izvpare'll all an laibie depagement
de chaleur. le placer de maniere oue rein
no pine son aeration, Posez I'amplistuner
sur une surlace dure e etaoere ou table 7
no cralgnant par la chaleur, dc manlera s
cc quI'II v an un espace libre dau mc'ns
5 centimetres de chaoue core at a la e
ct denviron a centimetres uurdessus. Ne
iamais poser dubiel sur la grille d'aeration
oui oeut eventueilement se trouver sur le
dessus oe Iantp l-tuner

INSTALLATION DES ENCEINTES
Aflumml: Bien veriliar due cheque encelnte
a une lmpedence dau moins 3 ohms Icetta
yaleur est indiquee pres de ses bornes
de connextion ou dans la notice expli-
catiy , le cas eeheans consultar yosre
vendeuri. 5t Vous ecoutez simultanemcnt 4
enceinses de 4 ohms d'impedance, vous
risouez urie lorte distorsion et surcharge, si
yos enceintes pnt tine impedance de4 ohms,
s'assurer due seulemcnt 2 d'entre elles Varies
tionnent a la lois,

A. FONCTIONNEMENT EN STEREO-
PHONIE

. ENcElNTEs PnlNclPALEs r Deux
enceintas sont ne'cessaires pour l'ecoute
en stereo, Installer les 2 encelnoes contre
un ntur ou sur une etagere, a egale dis-
tance et en lace du lie-i d'ecoutc choisi
Fnur obtenir la mellleur allet stérén-
phonioue, les enceintes doivens else
distantes de 3 a 45 metres I'une de
l'autre et, si possible, placees d hauteui
d'oreille Vous pouvez aisement choisir
ieur emplacement scion vos prelerenccs
et ypsre local d'ecouie.

7. ENcElNTES SECONDAIRES - Si yous
souhaiter proliter de yotre installation
stereo dans une autre piece, yous pauvez
brancher une paise denceintes sur les
sorties SPEAKER 2" situees sur le
panneau arriere de l'appareil. Blerl aua
yous puissiaz avoir bescin d'lme crande
lonaueur de cable entre l'emplrsuner et
les enceinres disposes: dans une autre
piece. assures-yous due certe lonaueur
ne dépasse pas is a 20 metres et oue les
cables ont uno section tullisanle pour
eyirer toute perte de puissance.

Suivre les indications donntiet precedent-
ment Ill poursituer lesencelnlesseconr
oeires.

B. FONCTIONNEMENT EN PSEUDO»
OUADRIPHONIE

Le lonctionnement en pseudorquadrlphonie
necessite 4 enceintes dans une meme piece
at rendu possible par un circuit matriciel
special dons ces amle-Iunev est dote
Tourner le réglzge ENcElNTES du tableau
ayantssir ls position SPEAKER 4 CH.

Branches une paire d'enceintes Sur les
sosdes SPEAKER I comma nous Iavcrls
lndigue ci-dessus au paragraphe I de la

sizc, seating arrangement and acoustic
conditions, ll posssible, provide allowance
on the length o1 cables as later on you may
wish to locate the speakers oitlerently
irorn the original positions. We have m,
gassed a common way pl placing the BACK
speakers as illustrated in Fig. 1, but you
may arrange them in any way to suit your
tastes and llstenina conditions. Try some
Experimenlallcns to locate optimum ao
rions lor best sound dispersion and zms
bience

L R
5 D
L R
. a D

SPEAKER CONNECTION

Caution; no not apply power to the unit
until the speakers are connected properly
as described below

A. ll your unit has push nsert typ. spesker
terminals.

As shown in re, 2, the speaker terminals
are ouick.connect pushrlnsen type, and are
arranged into two boards. one lot SPKRrI
lmainI and the other ror SPKRQ (remote).
Push back the tab on each terminal, slip
the bare wire as the has she or the speaker
lead into the opened iaw or the terminal,
and release the tab to grip the bare wire
in the raw, iNote: it necessary, alter strip.
plrlg each end or speaker leads to obtain
a bare wtre, twist the bare strands together
so it will be easy to insert and also prevent
shorting amono stray strands.l Make ture
the positive ill lead oi each speaker is
connected to the ill terminal and the
around lei lead to tha lei terminal, and
right to RleHT and lets to LEFT.

E. it your unit has DINrIypu sputter
canninals.

When connectina the speakers to the DIN-
type terminals. make sure that the speaker
cables have DINrtvpe 2rprorlg plug on their
ends. Simply plug these cables to the
corresponding SPKR 1 terminals, right to
RIGHT and lait to LEFT

It you have another pair or speakers, cans
nect to the SPKH 2 terminals in the same
manner as the above

See Fig. 2 and Fig.1

AM ANTENNA CONNECTION
A ferrllemave AM loopstick antenna

1, im Abschnitt sTEREO-BETRIEE has
schriaban mit den Anschlusseri SPEAKER i
yerbunden Dies sind die VORDEREN"
lFRoNTi Lautsprecher.

Dia Pqulemng der an die Buchsan SPEAKER
2 angeschlcssanen "HINTEREN" (BACKI
Lautsprecher hangs yon dai Gmsse des
Raumas, seiner Sitzanordnung und seiner
Aktistik ab. Man sollte daher die Lelkungic
lartgen w relchlich bemessen, dass
urspninglicha Anordnuna der Lautsprecher
spoter noch geznderl werden kann. wii
emplehlen im allgamsinan aine Anordnung
der HINTEREN Lautsprecher wie in Abb 1;
Sta kbnllen aber nattirlich rode andere
wahlen, die lhrcrn Geschmack und den
Horbedingungen entspricht. Optimalen
Raurnklong linden sie am besten durch
elnlpes Irobiererl.

section "annllcnnement en Sténlullhonie"
Nous les appellerons "enceintes ayant.
L'emplacement des enceintes branchees sur
les sorties "SPEAKER 2" (appellees "ens
ceintes arsieresl yariera en lonctron des
dimensions de la salle d'ecouse, do Is dis-
pnsition dos meubles et des conditions
d'acoustioue, Dans lo mesure du possible.
pre'yoir une plus atande Icllgueur as cable
alin dc pouvoii changer ces enceintes de
place par la suite, Dans la figure i. nous
Mons presente la monieie habituelle de
disposer les enceintes arrieres Vous mudlr
lierez cette disposition selon tips gotiss
Personncls et yos conditions flécolne.
Faises plusieurs esseis de rscon a deterrninei
les EmpIacemenB qul yous procurent is
mellleure dillusion et la meillcure ambiance
sonose

Fig. 1 Suaaestcd speaker Iecation lordchannal operation. i
Abb. 1 Emplohlene Lautsprecheranosdnuna lurddtansl-astrteb
Fla. 1 Emplacement recommends dasancaintetpour une ecputo sur 4 canauk

FRONTSPEAKERS

voRoERE LAUTSPRECHER

ENCEINTES AvANT
HACKSFEAKERS
ninrsps LaussPnechsn
spcsiutes ARFUEHES

LAUTSPRECHERANSCH LUSS

Vorsieht: Gerat rtur einschalten, wenn die
Lautspredter sichtig,wie naohstehend has
schsiebanarigeschlossen sind.

A. Wenn ass Gerat KIemm-Lauupmchers
anschlusse has

wie in Abb 2 gezeigt, sind die Lautsprecher
anschlusse vom Schneliklemmlvp: sle sina
aul awe. aetrcnnten Platten angeordnet,
ainer riir die HauptrLautmrecher [SPKFH]
und einer liir die 2usatz-Lautspracher
ISFKHrZ). 2um Anschliessen l Hilte des Dmckers olrnen. abisolierten
Draht am lreien Ende der Lautsprecher.
leitung in tile aeollnete Klemme schieban
und durch Loslassen dos Druckers lest.
klornman. (Anmerkung Nach dent Ablsflr
liaran der Enden der Lautsprecnarleitunsen
sind, ralls eriordarlich, die lreigelegten
Litzan zusammenrudrehen, domit sia sich
leicht einschiaban lessen und keinen
Kurzschluss yerursechen kohnsn.) Daraul
achten, datt die Plusleitting 1+) der Laut.
sprecher mit der Plusklemma It) und die
Erdleitung I») mit dar Minusklemme Iel
verbunden Wird. Der rechte Lautsprecher
ist an die l die l

B. Wenn das sarit DIN-BuchselrLamr
machet- schliisse hat.

Beim Anschliessen der Lautsprecher an die
DINrBuchsen ist dsraul zu achten, dass die
Leutsprecherleitunpen twelpnhge DIN-
Ssecker an ihren Endan haben Diese Leis
tungen warden einiach in die entspscchanden
Euchsen sPKR 1 gessecks. die des rechten
Lautsprechers in die Euchse RIGHT und
die dos linken in die Buchse LEFT

3

LISTENER
HESRER
AuDiTEuR

BRANCHEMENT DES ENCEINTES

Attention: Sossurer oue les encemtes soient
correctement branch's comma indipue
crdessous.

A. Appareil ayant des bornes d'encaintss as
type RCA 4 pincss

Comma le montre le scheme 2, les bornes
denceirttes sont dc type RcAa introduction
par pince et sont disposees sur 2 plaqvelles
I'une (SPEAKER 1I pour les enceintes
pone-pales at I'zlnra [SPEAKER :l ceurics
encelnres secondalres Ecarter le iaouet out
protege chaaue borne de sortie. introduire
le caoIe denudc do l'ektremite libre du cable
d'enceinte dans la cavrte de la borne de
sortie et relacher le pouet oui pincera lc
cable sur la borne (Note si necessaire apres
ayoir dénudé chaoue Extrémllé des cables
d'epceinte. tordre les brins denudes. ce oui
lacllitera le branchemenr sur la borne et
eyitcra les courocircuitsi Assurar-yous
oue chaoue cébIe l+l dzncelme soit branche
sur la borne it) carrespcndante de I'szII-
tuner et due chaoue cable (v) d'enceinte
soit branche sur laborrie tel.

Assurezrvnus egalemcnt due l'enceinte de
droite soit branchee sur is borne droite
(RIGHT) de l'ampli-tunes et lenceinte de
gauche, sur la borne gauche ILEFTI.

B. Appareils ayant des bornes d'snceinses
da type um
Lorsoue vous branchez les enceintcs aux
bornes de sypc DIN, zssurezrvous que les
cables des enceintcs possedent des liches
A 2 broches de type DIN. arancher simple-
ment ces cables aux bornes correspondantes
ISVEAKER ti, drorte IRIGHTI pour