Pioneer ct 680 owners manual

This is the 28 pages manual for pioneer ct 680 owners manual.
Read or download the pdf for free. If you want to contribute, please upload pdfs to audioservicemanuals.wetransfer.com.

Page: 1 / 28
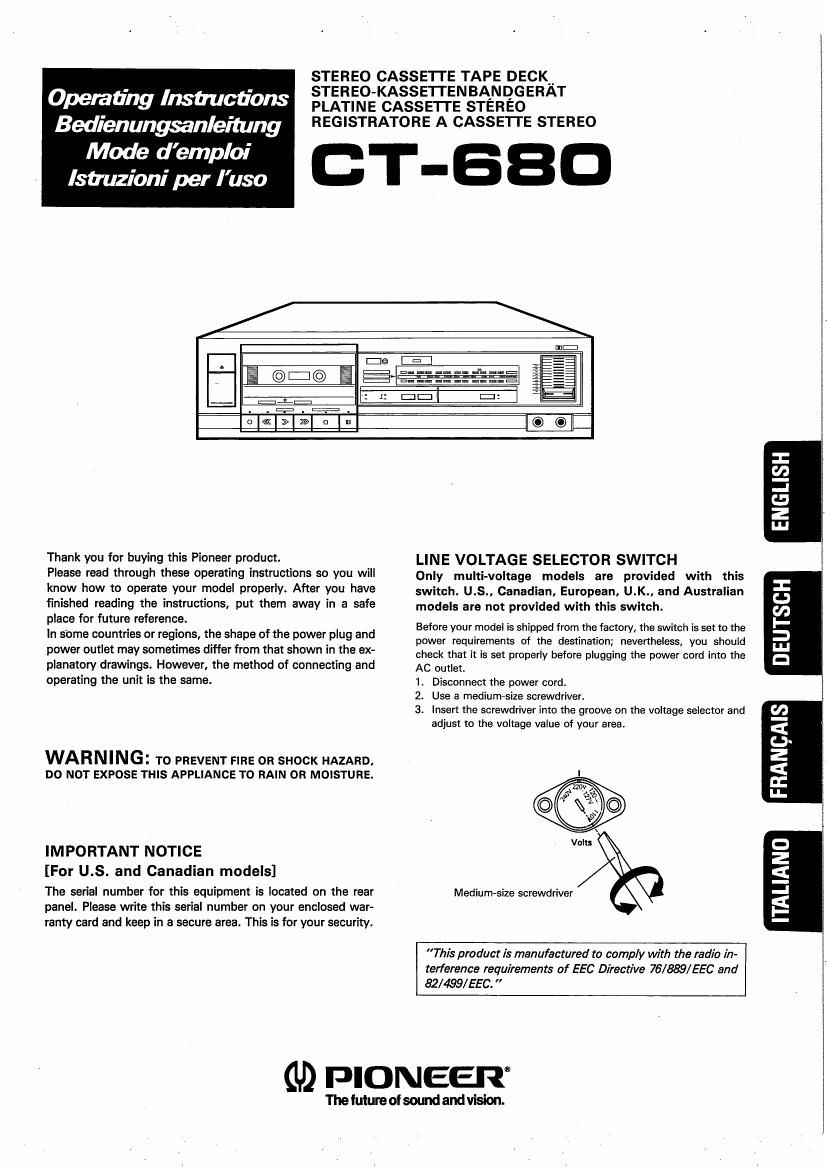
pioneer ct 680 owners manual

Extracted text from pioneer ct 680 owners manual (Ocr-read)


Page 1

Operating Instructions
Bedienungwnleitung

Mode demploi
lsiruzioni per Iuso

STEREO CASSETTE TAPE DECK__
STEREO-KASSE'ITENBANQGERAT
PLATINE CASSETTE STEREO
REGISTRATORE A CASSETTE STEREO

CT-EBD

DO

E @l:r© [@-

u- mu m- nun- .m'... u... ==J

=

:1._:

. -_E-

r -:'-
o|a|>|m| m In

ll© ©

Thank you for buying this Pioneer product.

Please read through these operating instructions so you will
know how to operate your model properly. After you have
finished reading the instructions, put them away in a safe
place for future reference.

In some countries or regions, the shape of the power plug and
power outlet may sometimes differ from that shown in the ex-
planatory drawings. However, the method of connecting and
operating the unit is the same.

WARNING: TO PREVENT FIRE on SHOCK HAZARD,
Do NOT expose THIS APPLIANCE TO RAIN on morsrune.

IMPORTANT NOTICE
[For U.S. and Canadian models]

The serial number for this equipment is located on the rear
panel. Please write this serial number on your enclosed ware
ranty card and keep in a secure area. This is for your security.

LINE VOLTAGE SELECTOR SWITCH

Only multi-voltaga models are provided with this
switch. U.S., Canadian, European, U.K., and Australian
models are not provided with this switch.

Before your model is shipped from the factory, the switch is set to the

power requirements of the destination; nevertheless, you should

check that it is set properly before plugging the power cord into the

AC outlet.

I. Disconnect the power cord.

2. Use a medium-size screwdriver.

3. Insert the screwdriver into the groove on the voltage selector and
adjust to the voltage value of your area.

Mediumsize screwdriver

T his product is manufactured to comply with the radio in-
terference requirements of EEC Directive 76/889/ EEC and

82/499/EE .

(L9 PIONEER

The iuture of sound and vision.

9
<
u
z
<
r:
Inl-

ITALIANO

Page 2

READ INSTRUCTIONS - All in: safety and
Wiring inmctionl lhnuld be reld below "I!
appliance it wanted.

RETAIN INSTRUCTIONS - The operating innmb
lion: should In mined for tulure let-runes.
NEED WARNING - All wanting: an the Ippllnce
and in lhl Owning instructions should I). Idllered

to.

FOLLOW INSTRUCTIONS - AI operating and use
instruction: should be followed.

WATER AND MOISTURE - Thu apprrenee should
not be used near watar - tor example, near I
hllhl'ub, washbawl, kitchm Sink, laundry tub. in l
wel baumnt. or near I swimmlng pool, etc.

LOCATION - The applia on should be installed in I
table location.

WALL OR CEILING MOUNTING - Tho appliance
should not. be mounted to I wall or ceiling.

VENTILATION - The appmnoa should be situated so
that its loclfian or position does no: interim with
iLI proper ventilation. For oralrvple. the mlianoa
thould not be aim-tad on I had, soil, run. or
similar surf! tlllt mlv block the ventilation upen-
ings; or, placed in a punt-in innallation, melt at a
bookcase m cabinet that may impede the flow at
air through the ventilation openings.

HEAT - Tllu applianu should be situlted away from
hell scum: such as rIdianrs, met ragllleu.
Item, in nth-r appliances (including amplifiers)
that produce heat.

POWER SOURCES - The appliance should be con-
nected to a power supply only of the type
dascnlrad in the operating instructions or as
marked on the appliance.

POWER-CORD PROTECTION - Pmr-sunplycordl
should be turned so that they are nol Iiltlly to he
walked on or pinched key items placed upon at
against thorn, paying particular attention to cord:
at plugs, convenience recemclel, land the paint
whale they it from the appliance.

POLARIZATION - II ywr pinch-wed product it pm»
video with a polarized powar plug. please read the
lonewing instructions. this product is aquipped
with a polarized siternating ourrem line plug is plug
having one blade wider than the other). This plug
will fit into the power outlet only one way. This is a
safety tear-ire. ll you an unable to inson the plug
hilly into the outlet. try reversing lhe plug, ii the
plug should still In ta fit. contact your alactncian
to replace your obsolete outlet. on not daieat the
salary purpose or the polarired plug.

' CLEANING - The appliance should be cleaned only
with I polishing cloth in I soft dry cloth. Never
dean with fumitura wax, benzino, insecticides or
other volatile liquid! since they may conode the
cabinet.

SAFETY INSTRUCTIONS

POWER LINES - An outdoor lntenno should be
locatad away from war lines.

NONUSE PERIODS - The pow" cord at Ill. Ip-
plienoe should be unplunnod from the outlet whorl
lelt unused lot a long period or time.

OBJECT AND LIQUID ENTRY - Care should be
taken so till! objects do nor tall and liquid! are not
spilled into the enoloeurs through cmingl.

DAMAGE REQUIRING SERVICE - The appliance
should be serviced by a Pioneer authorized service
comer nr qualfied :ervina personnel when:

. The power-supply cord or the plug has been
damaged; or

' Obiect: have llllon, or liquid he! been willed Into
the lwllnnoo: or

. The appliance has boon expasod to rain; or

I The appliance docs not non-or to operate normally
or sahrnita a marked change in perlorrnanco; Dr

- Tho appliance has boon dropped; or the enclosure
damaged.

SERVICING - The user should not ltumpt to service
the appliance Mona thlt dmfibod in the
operating inmcfim. For all other servicing, con-
tact tha heaven Pionur authorized service center.

PUNEI titres

swine
mullet
cmowrols .

OUTDOOR ANTENNA GROUNDING - If In

amide antenna is connected to the anlunnl
terminal, be aura tho Intonnl system is
gmunded so as to provide some protection
against voltage surges and built up static
charges.
In llte U.S.A. section SlDol the National Eluc-
vice! Code. ANSI/NFPA No. 704884, pro-
vides iniannation with reorient to 910W
grounding or the mast and supporting struc-
ture. grounding or the leed-ln wirato anantan-
na discharge unit, size or grounding conduc-
tars, location of antenna-discharge unit, con-
nection to grounding electrodes. and ur-
gulrernents let the grounding sleetrode. See
Fig. A.

ll Use No. 10 AWG (5.3 mml
coDW, No. 8 AWG [8.4
mm) aluminum, No. 7
AWG (LO mm) cower-
clad steel, bronze wire, or
larger as ground wire.

bl Secure antenna load-in and
gmund wires to house with
stand-nil insulators spaced
from 4 hat (1 .n meters) to

3 a last (1.3: meters) span.

cl Mount antenna discharga
unit as closely as possible to

sum err
thwuvuks o

ANYEMIA
will in WIRE

when load-in enters house.

VoinkaALAMrEmA d) Usejumperwil'anotsmeller


Fawn some:
nnouuowo [LiETRWE svsrw
rug him-m mil mm w-i

WNDlNlS l
JUMPER a I
:1

FIG.A

W F "W than No.6 AWG (13.3 mm'l
copper or equivalent when
r" oi's'tirr'ilrlse uNlr ; separate enigma-ground-
ing electrode rs used.
nncuun
writ .n

or: SEE
ntc sectiorr arnzr III

IMPORTANT 1

The lightning flash with Irrawhead. within an
equilataral triangle, is intcnded to 31m this user at the
Drama 0' uninsuleted "fllnumus wings" within the
products enclosure that may in of sufficient magnitude
to oonstitllta a risk or electric shock to persons.

CAUTION

RISK OF ELECTRIC SHOCK
DO NOT OPEN

CAUTION:

TO PREVENT THE RISK OF ELECTRIC SHOCK. DO
NOT REMOVE COVER (OR BACK]. NO USER
SERVICEABLE PARTS INSIDE. REFER SERVIC-
ING T0 DUALIFIED SERVICE PERSONNEL.

The exclamation point within an equilateral triangle is
intended to alert the user ol the oramnoe ol important
operating and maintenance (servicing) instructions in
the literature accompanying the appliance.

IM P0 RTANT 2

If the aopamus is lined with AC mains power autietls).
see REAR VANEL FACILITIES for convenient Conner,
tion at additional HirFi componentlsl. Make all connec-
tions to the AC Gullstls) and the signal terminals first.
Connect the plug to the wall socket last, make sure that
the power switch is off. Disconnect the wall plug when
the equipment is not in (regular) use, eg. when on
vacation.

FOR USE IN THE UNITED
KINGDOM

The wires in this mains lead are coloured in accordance
with the following code:

Blue: Neutral

Brown: Live

As the colours of the wires in Ills mains lead of this ap-
peralus may nol correspond with the coloured marking
identirying the terminals in your plug proceed as
follows:

The wire which is coloured blue must be connected in
the terminal which is marked with the letter N or col-
oured black.

The wire which is coloured brown must be connected to
the nermirlal which is marked with the letter L or col-
oured red.

Equipment sold in the U.K. is not supplied with a
power plug.

2