Pioneer a 229 owners manual

This is the 11 pages manual for pioneer a 229 owners manual.
Read or download the pdf for free. If you want to contribute, please upload pdfs to audioservicemanuals.wetransfer.com.

Page: 1 / 11
pioneer a 229 owners manual

Extracted text from pioneer a 229 owners manual (Ocr-read)


Page 1

STEREO AMPLIFIER

A122 9/A-119

Opera ting

Instructions

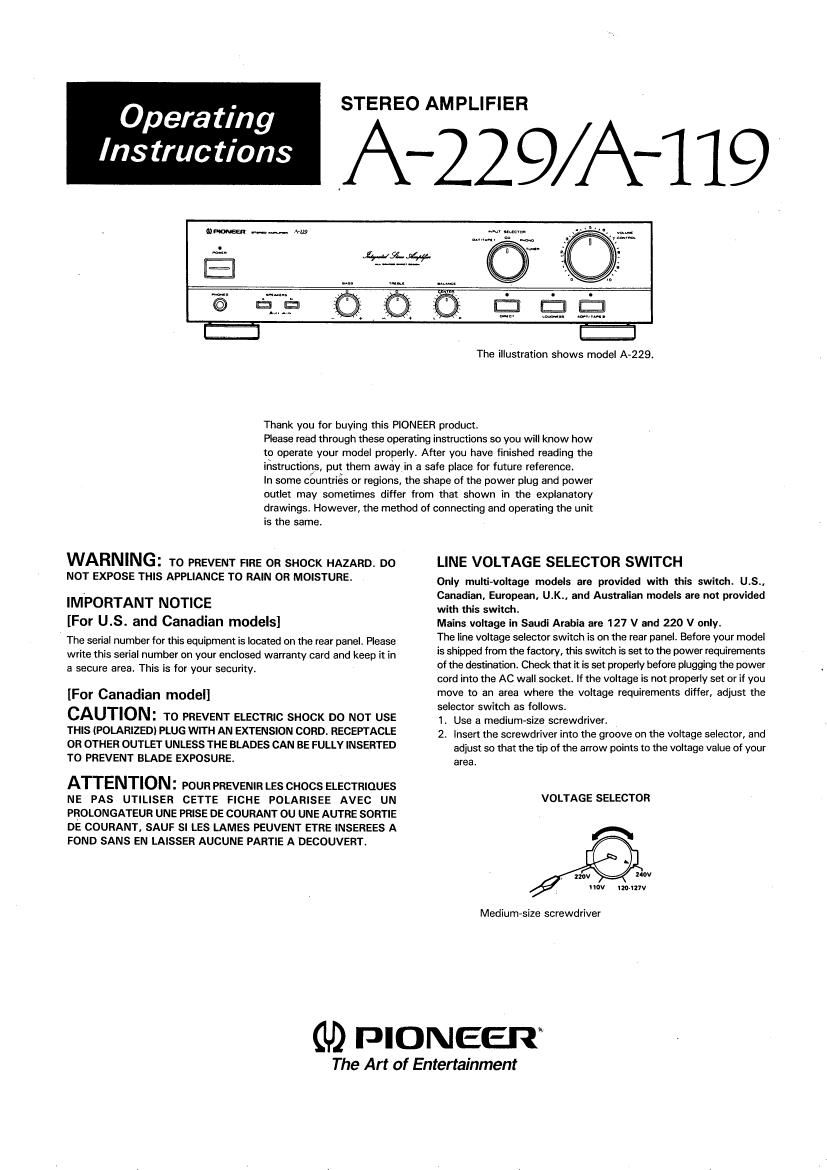
The illustration shows model A-229.

Thank you for buying this PIONEER product.

Please read through these operating instructions so you will know how
to operate your model properly. After you have finished reading the
instructions, put them away in a safe place for future reference.

In some cOuntries or regions, the shape of the power plug and power
outlet may sometimes differ from that shown in the explanatory
drawings, However, the method of connecting and operating the unit

is the same.

WARNING: To PREVENT FIRE OR SHOCK HAZARD. DO
NOT EXPOSE THIs APPLIANCE T0 RAIN 0R MOISTURE.

IMPORTANT NOTICE
[For U.S. and Canadian models]

The serial number for this equipment is located on the rear panel. Please
write this serial number on your enclosed warranty card and keep it in
a secure area. This is for your security.

[For Canadian model]

CAUTION: TO PREVENT ELECTRIC SHOCK Do NOT USE
THIs (POLARIZEDI PLUG WITH AN EXTENSION CORD. RECEPTACLE
OR OTHER OUTLET UNLESS THE BLADES CAN BE FULLY INSERTED
To PREVENT BLADE EXPOSURE.

ATTENTION : POUR PREVENIR LEs CHOCS ELECTRlQUES
NE PAs UTILISER CETTE FICHE POLARISEE AVEc UN
PROLoNeATEUR UNE PRISE DE COURANT ou UNE AUTRE SORTIE
DE COURANT, SAUF SI LES LAMES PEUVENT ETRE INSEREES A
FOND SANS EN LAISSER AUCUNE PARTIE A DECOUVERT.

LINE VOLTAGE SELECTOR SWITCH

Only mum-voltage models are provided with this switch. U.S. ,

Canadian. European, U.K.. and Australian models are not provided

with this switch.

Mains voltage in Saudi Arabia are 127 V and 220 V only.

The line voltage selector switch is on the rear panel. Before your model

is shipped from the factory, this switch is set to the power requirements

of the destination. Check mat it is set properly before plugging the power

cord into the AC wall socket. If the voltage is not properly set or if you

move to an area where the voltage requirements differ, adjust the

selector switch as follows.

1. Use a medium-size screwdriver.

2. Insert the screwdriver into the groove on the voltage selector, and
adjust so that the tip of the arrow points to the voltage value of your
area.

VOLTAGE SELECTOR

rs

mv W
nov Inn/7v

Medium-size screwdriver

(1,9 PIONEER

The Art of Entertainment

Page 2

IMPORTANT

The llghlning Ilash wIIh anowhead, wIIhIn an equilaIelaI
triangle, is intended to alert the user to the presence ct
uninsulated dangerous voltage" within the product's
enclosure that may be oI suIIicient magnitude to constitute
a risk OI elecIric shock In persons.

CAUTION

RISK OF ELECTRIC SHOCK
DO NOT OPEN

CAUTION:

To PREVENT THE RISK OF ELECTRIC SHOCK, DO
NOT REMOVE COVER [OR BACKI NO USER
SERVICEABLE PARTS INSIDE, REFER SERVICING T0
QUALIFIED SERVICE PERSONNEL.

The exclamation point wllhln an EqullaIeral triangle is
Imeflded to alerI The user ID lhe presence OI Impolanl
operating and maintenance lservicingl instructions in
the literature accompanying the appliance

IMPORTANT

II the apparatus is lined with Ac mains power outletlsl.
see REAR PANEL FACILITIES Ior convenient
connection ot additional Hi-Ei componentlsl, Make all
connections to the Ac outletlsl and the signal terminals
lirst, Connect the plug to the wall socket last (make
sure that the power swrtch is oll.l

FOR USE IN THE UNITED
KINGDOM

The wires in this mains lead are coloured in
accordance with the Iollowing code:

Blue: Neutral

Brown: Live
As the colours ot the wrres in the mains lead oI this
apparatus may not correspond with the coloured
marking identiIving the terminals in your plug proceed
as Iollows:

The Wire which is coloured blue must be connected to
The lermmal which IS mavked with The leIIer N or
coloured black.

The wIIe whlch ls coloured brown musI be Connected
to the Terminal which Is marked WITI'I (he leuer L or
Colouved red.

Do nOI Connecl either wlle To The eznh Iermlnal ol 5
three pin plug.

Equipmenl sold in the U.K. is not supplied with a power
plug.

READ leTRuCTlONs - All the saIety and operating
instructions should be read heIore the appliance is
operated.

RETAIN INSTRUCTIONS e The operating Insuquons
should be retained tor luture reterence

HEEDWARNING -« All warnings on the appliance and in
the operating instructions should be adhered to.

FOLLOW INSTRUCTIONS n All operating and use inn
structions should be followed.

wATER ANI) MOISTURE - The appliance should not
be used nearwater - Ior example, near a balhlub,
washoowl, kitchen slnk, laundry tuo;in a wet base-
ment, or near a swimming pool, etc

LOCATION e The appliance should be installed in a
stable location

WALL 0R CEILING MOUNTING - The appliance
should not be mounted to a wall or ce rig.

VENTILATION - The appliance should he situated so
that its location or position does not inlerfere wlIh
its proper ventilation For example, the appliance
should notbe situated on a bed, sota. rug, or similar
surIace thatmay block the ventilation openings, or,
placed in a buIIIcin installation, such as a bookcase
or cabinet that may impede the Ilow ol air through
the ventilation openings.

HEAT , The appliance should be situated away lrom
heat sources such as radiators, heal registers,
stoves. or other appliances (including ampliliersi
that produce heal

POWER souRcEs r The appliance should be con-
nected to a power supply only pl the type de-
scribed in the operating instructions or as marked
on the appllance,

POWER-CORD PROTECTION , Powerssupply cords
should be routed so that they are not likely to be
walked on or pinched by items placed upon or
against them Pay particular attention to cords at
plugs, convenience receptacles. and the point
where they exit Item the appliance.

POLARIZATION - II your purchased product is pro-
vided wrth a polarized power plug, please read the
Iollowing instructions. This product is equipped
with a polarized alternating currentline plug Ia plug
having one hlade wider than the otheri This plug
will In into the power outlet only one way This is a
saIely leature. lI you are unable to insert the plug
tully into the outlet, try reversing the plug. II the
plugshould stillIail lotil,contactvourelectrician to
replace your obsolete outlet Do not deleat the
salary purpose oI the polarized plug

CLEANING - The appliance should be cleaned only
with a polishing cloth or a soil dry cloth. Never
clean with furnIIuIe wax, benzine, insecticides or
other volatile liguids since they may corrode the
cabinet,


POWER LlNEs- An outdoor antenna should be located
away trom power lines

NONUSE PERIODS - The power cord oi the appliance
should be unplugged trorn the outlet when leh un-
used Ior a long period ol time,

OBJECT AND LIQUID ENTRY - Care should be taken
so thaiooiectsdo notlall andliooids are notspilled
into the enclosure through openings.

DAMAGE REOUlRlNG SERVICE - The appliance

should be serviced by a Pioneer amhoriled service

center or oualilied service personnel when:

The power-supply cord or the plugzhas been dam-

aged.

Ohlecis have lallen, or liquid has been spilled into

the appliance.

The appllance has been Exposed To rain,

The appllance does not appear To Operaie normally

or exhibits a marked change in perlormance

The appliance has been dropped or the enclosure

damaged

SERVICING A The user should not attempt to service
Ihe aDDIianCe beyond IhaI described In The Opera
ling instructions. For all other servicing. contact the
nearest Pioneer authorized service center

\.

ELECTRIC
SERVICE
EOUIPMENT

SAFETY INSTRUCTIONS

OUTDOOR ANTENNA GROUNDING E Ifan outside an-
Ienna is connecled Io Ihe anIenna IeTminal, be sure
the antenna system is grounded so as to provide
some protection against voltage surges and built
up slaIic charges.
in the us A. section 810 oI the National Electrical
Code, ANSI/NFPA No. 704954, provides informa-
tion with respect to proper grounding oi the mast
and supporting structure, grounding ol the lead-in
wire to an antenna discharge unit, size ol grounding
conductors, location ot antenna discharge u
connection to grounding electrodes. and require»
ments Ior the grounding electrode See Flg A

CART 7 An appliance and cartcomhinaiion should be
moved with caret Quick slaps. excessive Iorcel and
uneven surtaces may cause the appliance and cart
combinaIion To Ovevturn.

NEC NATIONAL ELECTRIC CODE

ANTENNA
LEAD IN
WIRE

ANTENNA
DISCHARGE UNIT
INEC SECTION EIO 20)

GROUNDING CONDUCTORS
INEC SECTION BIO ZII

>~.. GROUND CLAMPS

1" ' POWER SERVICE GROUNDING

ELECTRODE SVSTEM

FIG. A

INEC ART 250, PART H)

2