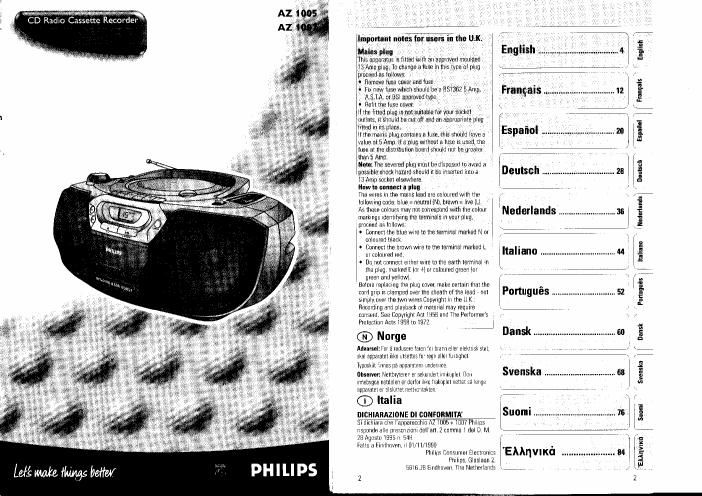
Philips az 1007 owners manual
This is the 26 pages manual for philips az 1007 owners manual.
Read or download the pdf for free. If you want to contribute, please upload pdfs to audioservicemanuals.wetransfer.com.
Extracted text from philips az 1007 owners manual (Ocr-read)
Page 1
lam-v:- x- , '7 ,7",l§l\|
CD Radio Cassette Record
'lmpomnt notes for users in the U.l(.
Mains play
This apparatus 'is fitted with an approved maulded
13 Amp plug. To change a fuse in this type at plug x-W#_._fl
proceed aslnllpws; :-- -~------ \ ,.
- Remove fuse cover and fuse ,
~ Fix newfuse which should hea H9362 5 Amp,
ASIA. or BSl approved type,
0 Refit the fuse cover \_
If the fitted plug is not suitable for your socket ,V , ,7
outlets, It should be cut uff and an pppruprlate plug
fitted in its place
If the mains plug contains a lum, this should have a
value at 5 Amp lfa plug Without a fuse |S used, the
fuse at the distiibutiun board should irul be greater ' ' "**- W ~
thanEiAmp. i" " "
Mate: The severed plug must be tllsptisurl tn amid a l
possible shock hazard should it be inserted Into a Deutsch . ..................... 28
l3 Amp sucket elsewhere
How to connect a plug -4 7,
The Wires in the main: land are coloured With the /'
English
/.
Espnfiol l
Doutscli
\
lolluwing code. blue = neutral (N). brown = live {Ll l
As these colours may not correspond with the pplpur r Nederlands 35
markings rderititying ihe terminals iriwur plug,
proceed as follows
0 Connect the blue Wlle to the terminal marked N or
coloured black
0 Connect the brown wire to the terminal marked l. 1 -
ur coloured red, "allano
- Do not connect either wire to the earth terminal in
the plug, marked E {Uri} nrcnlpured green (or '7
gieen and yellow). / W "
Helore replacmg the plug never make certain that the
mid grip is clamped overthe sheath of the lead , not
Simply over the two eras Cppvright lit the U K
Recording and playback at material may require
cunseiit. Sea Copyright Ant 1.956 and The Performers
Protection Acts lflfifi to 1972
® Norge ' ' Dansk
Advarsel: For 5 redusere laren ci hrarn eller elektrisk slut, in r W we,
skal apparatei ikke metres lo regn ellertuttighct x ' ,,,-\
TVDOSlUll lZriries pa apparaiens lndElSlCE l
Observer: Neltbmerer er sekunilert iriiikuplul Den
innebvgoe netdelen er derlor ll<
G) ltalia
picniAnAszE DI CONFORMITA' SUDmI
Si rlichiara Clfi lapparecchin /\Z lflflfi + lUOT Philips
3
[Ponupuésl l Itiliano \ lflaaerlalids
\
0|
9
Dansk
\
/
\
2..
Q
I Svenaka
Suomi
{ Frangals
l
l
risphnde alle pleSCrlZlOnl dell'art 2cpmrna l del Dr M
28 Agosto lQSS ii 54H *
Fallp a Fliirllinven, ll Ulrll/lSBS ' ,
Philips Ennsiirner Electrpnlcs EAAnVI Ka
Philips, Glaslaan 2,
/ EElG JB EIIMlIUl/EIL The Netherlands \ __, J
M; We W MW t 3
EM nvmb
Page 2
«some i
CONTROLS
POWER SUPPLY
IPP AND FRONT PANEL
5:- Source selector . to select source of sound
CD-RADlO-TAPE and also the POWER OFF
switch.
"2) VOLUME - to admit volume level
:ér DBB - Dynamic Bass Boost fora more vivid
bass response
BASSEn'E RECORDER.-
QD PAUSE ll - to interrupt recordirg or playback
STOP-OPEN I A » To stop the. tape and to
open the casxelte holder,
SEARCH « or» . to fast it'iiidrrewind the
tape,
PLAY 4 . :0 start nlayhack.
RECORD 0 . to start recording,
15) Cassette companment
CD PLAYER:
.g- CD Display - to Show the CD functions
7 PLAYOPAUSE >II - To start or interrupt
CD play
STOP I - to Stop playback or erase a
programme.
CD MODE . to select a different play mode
eg SHUFFtE/REPEAT; to programme and
mum programmed track numbers
SEARCH i« or »i . to skip or search a
passage/ track backwards or forward
it. LIFT TO OPEN - to open/ close the CD door
RADIO:
'9'? BAND - to select FM/MW wave band
Tuning dial pointer
1i TUNING . to tune to radio stations
PEEK PANEL: 7777-77] *
127 Battery door to open the battery
compartment
{{3} BEAT CUT switch - To eliminate any whistle
tones during MW recordings.
ifii Telescopic aerial Atn improve l'M
reception
is ii: 3 5mm stereo headphone socket
Nare:Cnnnecting headphones Wlll switch on the
loudspeakers
lie» AC MAINS - socket [or mains lead
Potteries
Whenever convenient. use the mains supply if you want to
conserve battery life The, battery supply will be switched ott when
the set is connected to the mains. Make sure you remove the plug
from the set and wall outlet before inserting batteries.
Batteries (optional)
1. Open the battery compartment and insert six batteries. type H20,
UMt or Dicetls [preferably alkaline) With the correct polarity as
indicated by the [+) and [-1 symbols inside the compartment.
2. Replace the. compartment door, making sure the batteries are =. A
firmly and correctly in place The set is now ready tn operate
7 lnoorrect use of batteries can cause electrolyte leakage and will
corrode the compartment or cause the batteries to burst.
Therelore:
- Do not mix battery types, eg alkaline wrth carbon zine.
Only use batteries of the same type for the set
When inserting new batteries, do not try to mix old batteries E
with the new ones.
llllllllllll
- Remove the batteries ii the set is not to be used for a long BxllflllMLDDell:
time
Batteries contain chemical substances, so they should be
[disposed of properly