Nad PP 3 Owners Manual

This is the 1 pages manual for Nad PP 3 Owners Manual.
Read or download the pdf for free. If you want to contribute, please upload pdfs to audioservicemanuals.wetransfer.com.

Page: 1 / 1
Nad PP 3 Owners Manual

Extracted text from Nad PP 3 Owners Manual (Ocr-read)


Page 1

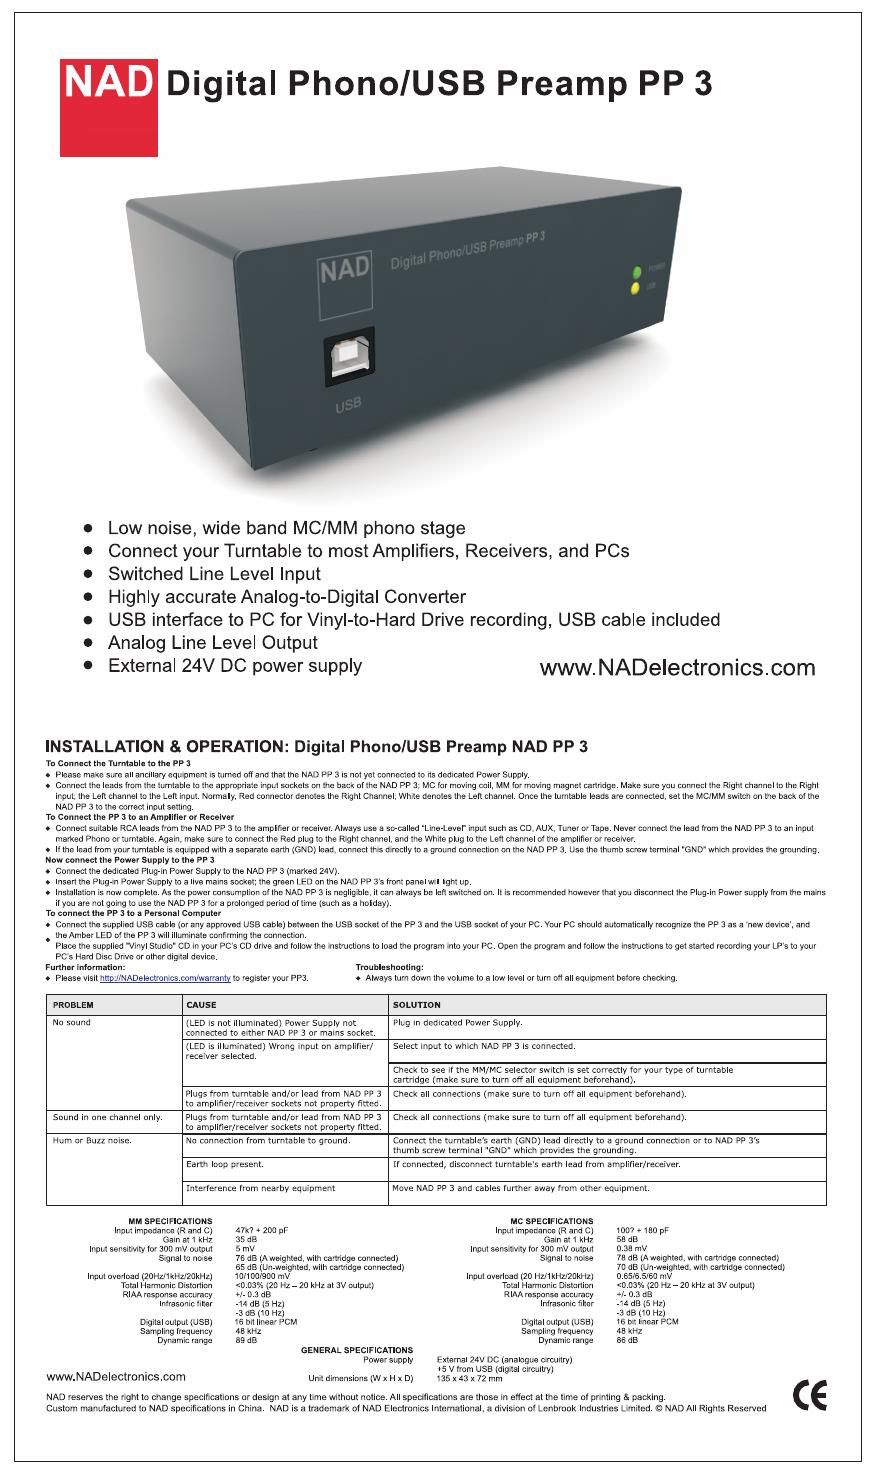
NAD Digital PhonolUSB Preamp PP 3

Low noise, wide band MC/MM phono stage
Connect your Turntable to most Amplifiers, Receivers, and PCs

Switched Line Level Input

Highly accurate Analog-to-Digital Converter

USB interface to PC for Vinyl-to-Hard Drive recording, USB cable included
Analog Line Level Output
External 24V DC power supply

www.NADe|ectronics.com

INSTALLATION & OPERATION: Digital PhonolUSB Preamp NAD PP 3

To Connect the Turntable to the PP 3

o Please make sure all ancillary equipment is turned oil and that the NAD PP 3 is not yet connected to its dedicated Power Supply

o Connect the leads from the turntable to the appropriate input sockets on the back of the NAD PP 3, vie for moving coil, MM for moving magnet cartridge Make sure you connect the Right channel to the Right
input. the Left channel to the Left input. Normally. Red connector denotes the Rtght Channel, White denotes the Left channel Once the turntable leads are connected. set the MCIMM switch on the back of the
NAD PP 3 to the correct input setting

To Connect the PF 3 to an Amplifier or Receiver

e Connect suitable RCA leads from the NAD PP 3 to the amplifier or receiver Always use a Soccalled Linetevel input such as CD, AUX. Tuner or Tape. Never connect the lead from the NAD PP 3 to an input
marked Phono or turntable Again. make sure to connect the Red plug to the Right channel and the White plug to the Left channel of the amplifier or receiver

a ltthe lead from your turntable is equipped with a separate earth (GND) lead. connect this directly to a ground connection on the NAD PP 3 Use the thumb screw terminal "GND" which provides the grounding.

Now connect the Power Supply to the PP 3

e Connect the dedicated Plugsln Power Supply to the NAD PP 3 (marked 24v)

o insert the Plugin Power Supply to a live mains socket; the green LED on the NAD PP 3s front panel will light up.

- lnstallation is now complete As the power consumption of the NAD PP 3 is negligible. it can always be left swrtched on It is recommended howeverthat you disconnect the Plug-in Power supply from the mains
it you are not going to use the NAD PP a for a prolonged period ol time (such as a holiday).

To connect the PP 3 to a Personal Computer

e Connect the supplied use cable (or any approved use cable) between the use socket of the PP 3 and the use socket oi your Pc. Vour Pc should automatically recognize the PP 3 as a new device. and

. the Amber LED of the PP 3 will illuminate confirming the connection.
Place the supplied "vinyl Studio" CD in your PCs on drive and follow the instructions to load the program into your Pc Open the program and follow the instructions to get started recording your LPS to your
Pcs Hard Disc Drive or other digital device.

Further information:

o Please visit http://NADelectronics.coni/warrangr to register your PP3

Troubleshooting:
e Always tum down the volume to a low level or turn elf all equipment before checking

PROBLEM CAUSE SOLUTION

No sound (LED is not illuminated) Power Supply not Plug in dedicated Power Supply.

Connected to either NAD PF 3 or mains socket.

(LED is illuminated) Wrong input on amplifier/
receiver selected.

Select lnput to which NAD PP 3 is Connected.

Check to see if the MM/MC selector switch is set correctly for your type of turntable
cartridge (make sure to turn off all equipment beforehand)

Plugs from turntable and/or lead from NAD PF 3
to amplifier/receiver sockets hot property ntted.

Plugs from turntable and/or lead from NAD PP 3
to amplifier/receiver sockets not property titted.

No connection from turntable to ground.

Check all connections (make sure to turn off all equipment beforehand).

Sound in one channel only. Check all connections (make sure to turn off all equipment beforehand).

Hum or Buzz noisei Connect the turntables earth (GND) lead directly to a ground connection Dr to NAD PP 3:

thumb screw terminal "GNU which provides the grounding.

Earth loop present. If connected, disconnect turntables earth lead from amplifier/receiver.

Interference from nearby equipment Move NAD PP 3 and Cables further away from other equipment.

MM SPECIFICATIONS lvlc SPECIFICATIONS
lnput impedance (R and C) 47m . 200 pF input impedance (R and o) 1007 +150 pF
Sam at 1 kHz 35 dB Gain at t kHz 53 do

0 as mv
75 :13 (A weighted. with cartridge connected)
70 dB (Unawelghled. wrth canndge connected)
DIES/6.5160 niv

lnput sensitivity tor 300 mv output 5 mV

Signal to noise 76 de (A weighted. with cartridge connected)
55 dB (Unawelghted. with cartridge connected)
10/1001900 mv

input sensitivity for 300 mv output
signal to noise

lnput overload (zul-imktlmuknz)
Total Harmonic Distortion

RIAA response accuracy
lnfrasonic tiller

Digital output (USE)

Sampling lreqltency
Dynamic range

www.NADe|ectronics.com

<0 03% (20 Hz 7 20 kHz at 3v output)
#7 0.3 dB
44 dB (5 Hz)
73 de (10 Hz)
16 bit linear PCM
43 kHz
as dis
GENERAL SPECIFICATIONS
Power supply

Unit dimensions (w x H x D)

lnput overload (20 Hfl1Ksz20kHz)
Total Harmonic Distortion

RIAA response accuracy
lnfrasonic filter

Digital output (use)
Sampling frequency
Dynamic range

External 24v DC (analogue circuitry)
+5 v from use (digital circuitry)
135 x 43 x 72 min

<0 03% (20 H2 7 20 kHz at 3v output)
+/- o 3 dB

.14 dB (5 Hz)

.3 de (10 Hz)

l5 hit linear PCM

to kHz

86 dB

NAD reserves the right to change specifications or design at any time without notice. All specifications are those in effect at the time of printing 8r packing.
Custom manulactured to NAD specifications in China NAD is a trademark ol NAD Electronics international. a division of Lenbrook Industries Limited © NAD All Rights Reserved

(6