Kenwood DNX 4289 BT Service Manual
This is the 122 pages manual for Kenwood DNX 4289 BT Service Manual.
Read or download the pdf for free. If you want to contribute, please upload pdfs to audioservicemanuals.wetransfer.com.
Extracted text from Kenwood DNX 4289 BT Service Manual (Ocr-read)
Page 1
MONITOR WITH DVD RECEIVER NAVIGATION SYSTEM
DNX42808T/5180/52808T
/5380/5380M/53808T
/558OBT/6040EX/6180
KENWOOD
Kenwood Corporation
/64BOBT/6980
SERVICE MANUAL
© 2011-3 PRINTED IN JAPAN
B53-0849-00 (N) 303
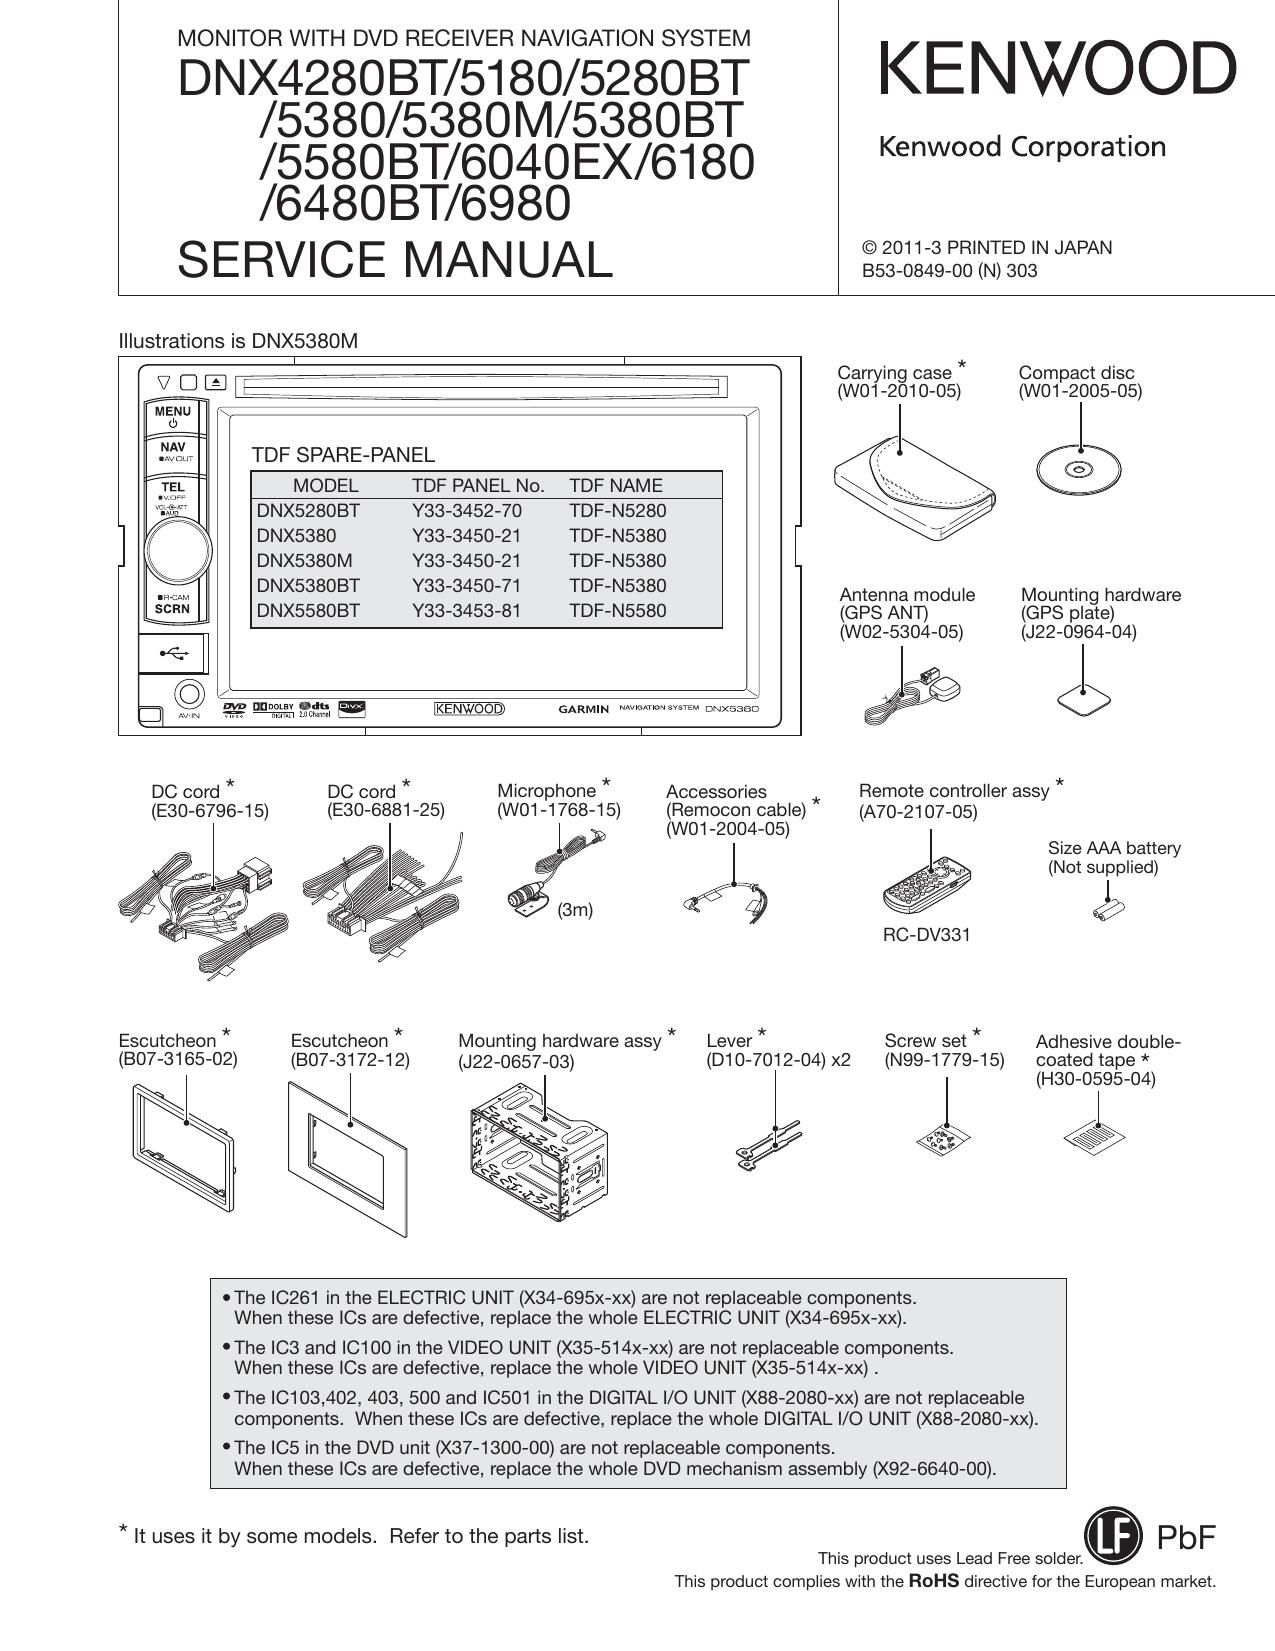
Illustrations is DNX5380M
7 7 7 7 7 Carrying case" Compact disc
V D E' Le 7 7 7 7 7 7 7ij (w01-2010-05) (wo1-2005-05)
MENU \ / l
d) 7
3153's TDF SPARE-PANEL ©
2 MODEL TDF PANEL No. TDF NAME
DNX52803T Y33-3452-70 TDF-N5280
] \ DNX5380 Y33-3450-21 TDF-N5380
I DNX5380M Y33-3450-21 TDF-N5380
DNX5SSOBT 333450-71 TDF-N5380 Antenna module Mounting hardware
DNX55803T Y33-3453-81 TDF-N5580 (GPS ANT) (GPS plate)
(W02-5304-05) (J22-0964-04)
/ \ ?$
3 W .22 "annals; 13:. mm mm: O
I I
DC cord * DC cord * Microphone * Accessories Remote controller assy *
(E30-6796-1 5) (E30-6881-25)
(WO1-1768-15)
Escutcheon *
(807-3172-12)
Escutcheon *
(807-3165-02) (J22-0657-03)
Mounting hardware assy *
(Remocon cable)
(A70-2107-05)
(WO1-2004-05)
Size AAA battery
(Not supplied)
2% 1
@
RC-DV331
Lever * Screw set * Adhesive double-
(D10-7012-04) x2 (N99-1779-15) coated tape *
I (H30-0595-04)
®
.
OThe |C261 in the ELECTRIC UNIT (X34-695x-xx) are not replaceable components.
When these |Cs are defective, replace the whole ELECTRIC UNIT (X34-695x-xx).
'The |C3 and |C1 00 in the VIDEO UNIT (X35-514x-xx) are not replaceable components
When these le are defective, replace the whole VIDEO UNIT (X35-514x-xx) .
'The |C103,402, 403, 500 and ICSO1 in the DIGITAL |/O UNIT (X88-2080-xx) are not replaceable
components. When these |Cs are defective, replace the whole DIGITAL I/O UNIT (X88-2080-xx).
'The |C5 in the DVD unit (X37-1300-00) are not replaceable components.
When these |Cs are defective, replace the whole DVD mechanism assembly (X92-6640-00).
* It uses it by some models. Refer to the parts list.
This product uses Lead Free semen.
This product complies with the ROHS directive for the European market.
Page 7
DNX42BOBT/5180/52803T/5380/5380M
/5380BT/5580BT/6040EX/6180/648OBT/6980
COMPONENTS DESCRIPTION
Ref. No. Application / Function Operation I Condition / Compatibility
I05 Logic OR
1C6 LDO 3.3V Regulator
|C100 DCDC controller LCD power supply, Variable LED power supply
[C101 LDO 3.3V Regulator
IC200 Logic Panel uCOM terminal protection
IC201 Voltage detect IC Reset signal generate at 4.4V
|C202 MCU [0 Panel system control [0
[C203 [Pod Authentication Coprocessor iPod Authentication
IC204 LDO 3.3V Regulator
IC400 OP Amp VCOM AMP
|C401 LDO 1.8V Regulator
[C402 F ROM Mstar FIRMWARE ROM
IC403 Logic AND
IC404 LDO 3.3V Regulator
|C405 LDO 1.8V Regulator
|C406 LCD Controller Croma y T/C Scaller
[C407 Logic AND
IC700 Logic Inverter
0142 SW Soft start for Input power supply for LCD Backllght
04~6 SW Input power supply detection
Q7 SW FET DCDC SW FET (LCD Backlight)
0100~103 SW Soft Start for +18V
0104~107 SW Soft Start for +9.2V
0108~110 SW Soft Start for -6V
0113,114 SW Soft Start for -6V
0115~117 SW Soft Start for +9.2V
0200 SW Reset signal control for Panel uCOM
0203 SW Reset signal control for Panel uCOM
0204~207 SW Soft Start for Panel uCOM power supply
0208 SW Reset signal control for Panel uCOM
0209 SW BLiPDET signal control for Panel uCOM
0212~218 SW Soft Start for Panel uCOM power supply
0219 SW RCAMilNT signal control for Panel pCOM
0220 SW Soft Start for Panel uCOM power supply
0221.222 SW Reset signal control for Panel uCOM
0400~403 SW Soft Start for LCD controller power supply
0404,405 Buffer Buffer for temperature property absorption
0600~605 SW Control for touch panel
0700 LED B lighting LED B Constant current circuit
0701 LED G lighting LED G Constant current circuit
0702 LED R lighting LED R Constant current circuit
0703 SW KEY LED signal control
0705 SW ILLiR signal control
Page 21
DNX4280BT/5180/5280BT/5380/5380M
/5380BT/55803T/6040EX/6180/648OBT/6980
TEST MODE
Key Specification
C33 Select the first file (start play back)
Next : Transfer to the next Adjustment screen.
Cancel :Transfer to the previous Adjustment screen.
(Transfer to the Test Mode Main screen while
displaying the top left screen of Figure 2.2.5)
Table1~10 : Selection of table for key illumi.
Step0~4 : Fine tuning.
Down/Up : Right and Left Adjustment.
Return : Transfer to Test Mode Main screen.
Transfer to Test Mode Main screen by pressing the [MENU]
hard key from the iPod video screen.
2.2.7 LCD Adjustment screen
This screen is used to perform adjustment of LCD.
The displayed contents of the LCD Adjustment screen is
displayed in Figure 2.2.7.
as Background color will be blue when Write OK" is dis-
played.
* Background color will be red when Write NG" is dis-
played.
2.2.6 iPod screen
Check communication for iPod authentication.
The iPod Authentication Chip Confirmation screen is dis-
played in Figure 2.2.6.
Switch to video connected to the iPod video line by press-
ing the [iPod V-Playj key. (Switching to iPod video can be
performed regardless of connection with the iPod.)
LCD Adjust LCD Adjust
Write OK/NG
Figure 2.2.7 LCD Adjustment screen
Key Specification
All Auto : Start Auto Adjustment. (The following five
Auto adjustments are executed continu-
ously)
W.B. Auto : Start the W.B. Auto adjustment.
AGC Auto : Start the AGC Auto adjustment.
DVD W.B. Auto : Start the DVD W.B. Auto adjustment.
HPOSI Auto : Start the HPOSI Auto adjustment.
Video W.B. Auto
iPod iPod Check
:>
Figure 2.2.6 iPod screen
Key Specification
iPod Check : Start the verification operation check of the
iPod verification chip.
iPod V-Play : Transfer to iPod video screen.
Cancel : Transfer to Test Mode Main screen.
Return : Transfer to iPod screen. (left of Figure 2.2.6)
* Background color will be blue when Write OK is dis-
played.
Background color will be red when Write NG" is dis-
played.
iPod V-Play key operation specification
A key to play back the Video contents in the iPod with 1 op»
eration.
Following sequence of operation is performed by pressing
the [iPod V-Play] key.
Q) Turn ON the [Videoj key in the iPod Source Control
screen
(2) Select Movie in the Video contents List screen
: Start the Video W.B. Auto adjustment.
: Transfer to the Flicker Adjustment screen.
: Transfer to Test Mode Main screen.
Flicker
Return
a Background color will be blue when Write OK" is dis-
played.
4< Background color will be red when Write NG" is dis»
played.
Set the DVD wallpaper to color bar with this adjustment
screen.
10 model was adjusting the W.B. adjustment and HPOSI
adjustment with the Navigation video, but 11 model will not
perform W.B. adjustment or HPOSI adjustment with the
Navigation video.
2.2.7.1 Flicker Adjustment screen
This screen is used to perform adjustment of the Flicker.
Transfer to this screen also when TenkeyO on the remote
controller is pressed.
The displayed contents of the Flicker Adjustment screen are
displayed in Figure 2.2.7.1.
21
Page 30
DNX428OBT/5180/5280BT/5380/5380M
/53808T/5580BT/6040EX/6180/6480BT/6980
30
TEST MODE
information to be cleared
DC Offset information/ Memory function/ Retailer mode in-
formation
- Additional information
The following information is cleared when region code is
written using a jig.
Serial No./ Security code/ Touch compensation value/ LCD
adjustment value/ Mechanism position adjustment value/
DC Offset information/ Memory function/ Retailer mode in-
formation
Note: When the nonvolatile memory is replaced by the cus-
tomer service, above data are cleared (not set), so re-adjust
using the Test mode.
2.3.13 Version Check
When a USB memory with a specific file is connected dur-
ing the test mode, it will compare to see whether the version
and information written in the file matches, and determine
OK/NG.
However, perform this after the startup of the Navigation is
completed.
Screen shown in Figure 2.3.13 is displayed once the evalu-
ation result is obtained.
Version Check
Application Processor
ijstem urcom Result |
IParlel urcom Result
i | i
jNavigatlorlS/W j Result | ICapacltanceDetectlonlCI Result j
erStar j Result | |BTModule | Result j
jovsamoF/E j Result | |PIN Code | Result j
jDvsamo B/E j Result | Region | Result j
jseseMap j Result | IDetailMap | Result j
jJunctionVlew j Result | |soMap | Result j
Figure 2.3.13 Version Check result display screen
Result column display specification
OK : Display when the result of Version Check is OK.
Background of display area is blue at this point.
NG : Display when the result of Version Check is NG.
Background of display area is red at this point.
Skip : Display when it is not target for Version Check.
If you have an item you want to make out of target of
Version Check, define ;" in the specific file placed in
the USB memory.
* Background of the screen will be blue if all the items were
not NG.
Perform Reset or Power OFF/ON after the Version Check is
completed.
2.3.14 End of the test mode
Perform Reset when ending the test mode. (Test mode will
continue by performing ACC OFF/ON or Power OFF/ON.)
2.3.15 Other
Do not operate the Back Up Memory function during the
Test mode.
There are the following restrictions during the test mode.
- It will not switch to R-CAM video even if Reverse interrupt
occurs while the test mode dedicated screen is display-
ing. (There is no problem when displaying a screen other
than the test mode dedicated screen.)
- It will not transfer to Screen adjustment screen when Ten-
key 6 is pressed while displaying the test mode dedicated
screen. (There is no problem when displaying a screen
other than the test mode dedicated screen.)
- It will not transfer to Flicker adjustment screen when Ten-
key 0 is pressed while displaying other than the test mode
dedicated screen. (There is no problem when displaying
the test mode dedicated screen.)