Kenwood DM 5090 Service Manual
This is the 40 pages manual for Kenwood DM 5090 Service Manual.
Read or download the pdf for free. If you want to contribute, please upload pdfs to audioservicemanuals.wetransfer.com.
Extracted text from Kenwood DM 5090 Service Manual (Ocr-read)
Page 1
whom/131475090 (K) COVER 97ill.282:25AM y [ w 2 /\
STEREO MINIDISC RECORDER
1 050M D/ DM-5090
DM-9090
SERVICE MANUAL
KENWOOD
©1997»11/BS1-5387-00 (K/K) 3191
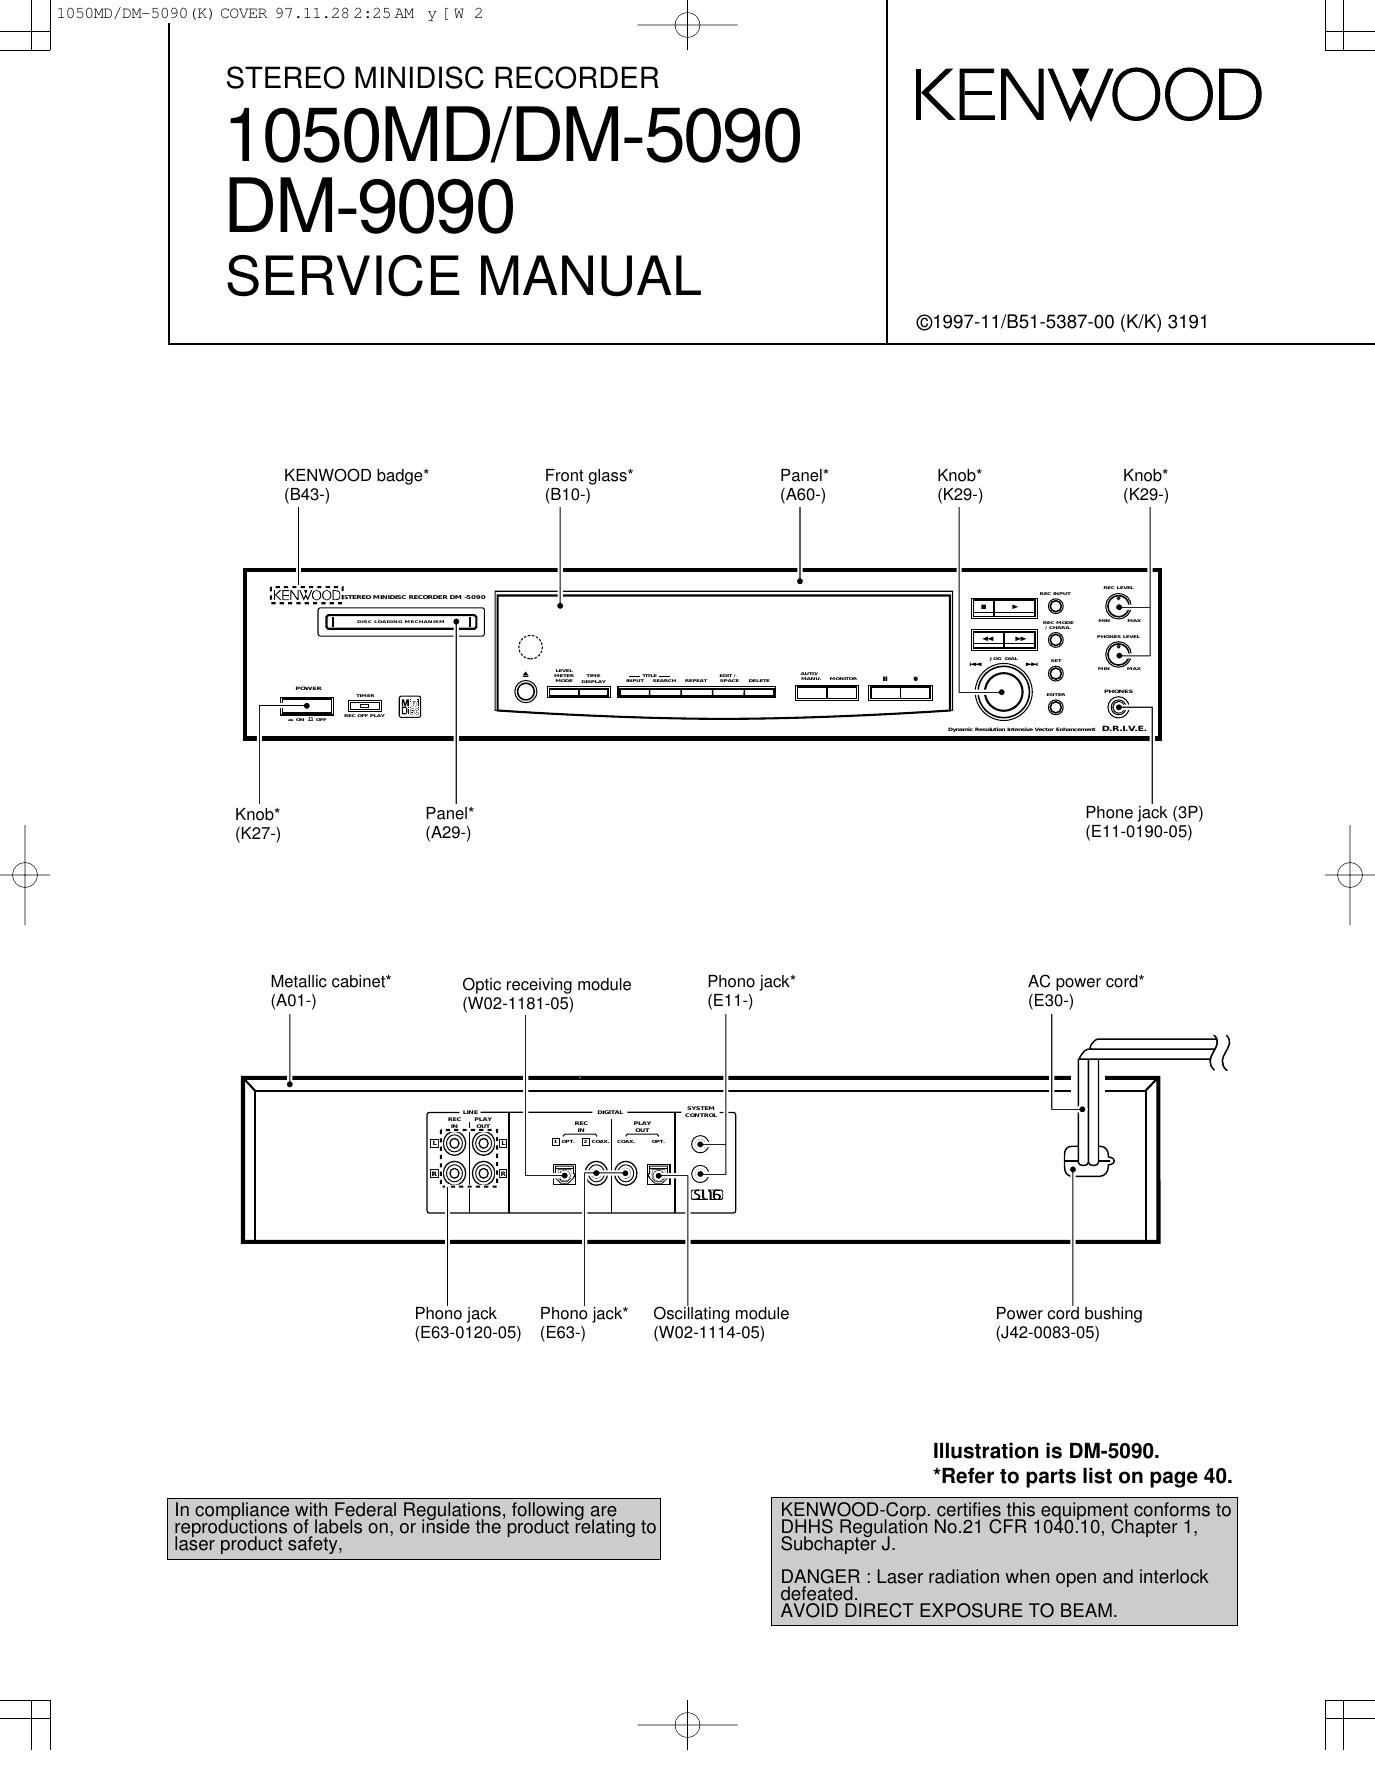
KENWOOD badge Front glass
(543-) (B10-)
Panel Knob Knob
(A60-) (K29-) (K29-)
Knob Panel Phone jack (3P)
(K27-) (A29-) (E11-0190-05)
Metallic oabinet Optic receiving module Phono jack AC power cord
(A01 -) (W02-1181-05) (E11-) (E30-)
l
Phono jack Phono jack
(E63-0120-05) (E63-)
In compliance with Federal Regulations, following are
reproductions of labels on, or Insude the product relating to
laser product safety,
Oscillating module
(W02-1114-05)
Power cord bushing
(J42-0083-05)
Illustration is DM-5090.
*Refer to parts list on page 40.
KENWOOD-Corp. certifies this e uipment conforms to
DHHS Regulation No.21 CFR1O 0110, Chapter 1,
Subchapter J.
DANGER : Laser radiation when open and interlock
defeated.
AVOID DIRECT EXPOSURE TO BEAM.
Page 2
lOBOMD/DMEEO9O (K) COVER 97.11.282125AM y [W 3
1050MD/DM-5090/DM-9090
+
CONTENTS/ACCESSORIES/CAUTIONS
CONTENTS
CONTENTS/ACCESSORIES/CAUTIONS....
EXTERNAL VIEW
BLOCK DIAGRAM ..
CIRCUIT DESCRIPTION. .
WIRING DIAGRAM .................................................... 1
4:2»wa
Accessofles
PC BOARD ......................
SCHEMATIC DIAGRAM ..
EXPLODED VIEW ..
PARTS LIST ............
SPECIFICATIONS ..................................................... 49
Audio cord (2)
(E30-0505-05)
Remote control unit (1)
(A70-1141-05: RC-M0702)
Batten! cover. (A09-0362-08)
System control cord (1)
(E30-2733-05)
Batteries (Re/AA) (2)
of
Optical fiber cable(1)
(519-1529-05)
AC adaptor (1)
(E03-0115-05)
TI» M type only
Cauflons
G
ote related to transportation and movement
Before transporting or moving this unit, carry out the
following operation.
1. Set the POWER key to ON without loading a Mini Disc.
0 Check that no disc is present in the unit.
2. Wait a few seconds and verify that the display shown
appean
3. Set the POWER key to OFF.
\
Beware of condensation
When water vapor comes into contact with the surface of
cold material, water drops are produced.
If condensation occurs, correct operation may not be possi-
ble, or the unit may not function correctly.
This is not a malfunction, however, the unit should be dried.
(To do this, turn the POWER switch ON and leave the unit
as it is for several hours.)
Be especially careful in the following conditions :
When the unit is brought from a cold place to a warm place.
and there is a large temperature difference.
When a heater starts operating.
When the unit is brought from an air-conditioned place to a
place of high temperature with high humidity.
When there is a large difference between the internal tem»
perature of the unit and the ambient temperature, or in con-
ditions where condensation occurs easily. /
Page 10
lOBOMD/DMe509O (K) COVER 97.11.282225AM y [w 19
iOSOMD/DM-SOQO/DM-QOQO
+
CIRCUIT DESCRIPTION
2. Change the playback point.
(1) Press the ENTER key during continuous playback. The
display then changes as follows.
|:M|D->OUT-> IN :I
(2) After the access operation is completed, the display
changes C=####" a=##.
Note: Numerals on the display appear the error rate and
ADIP error.
3. Terminating the continuous playback mode
(1) Press the DELETE key. The display then changes to
CPLAY MODE".
(2) Press the EJECT key to take out the disc.
Note : The playback start addresses of IN, MID, and OUT
are described below.
IN 30H cluster
MID 3OOH cluster
OUT 7OOH cluster
4-4-2 Operation in continuous recording mode
1. Entering the continuous recording mode
(1) Insert a recordable disc into the unit.
(2) Turn the JOG DIAL to display CREC MODE.
(3) Press the ENTER key. The display then changes from
CREC MODE" to CREC IN".
(4) Press the ENTER key again. The display changes from
CREC IN to CREC (####), and the continuous
recording is started.
Note: Numerals on the display (####) appear the address of
recording point.
2. Change the recording point.
(1) Turn the JOG DIAL to clockwise while CREC IN" is dis-
played. The display changes as follows. (The recording
point can be shifted.)
->M|D 4>OUT ->|N :I
(2) Press the ENTER key. The display then changes to
CREC(####), and the continuous recording is started.
Note : Numerals on the display (##1##) appear the address
of recording point.
3. Terminating the continuous recording mode
(1) Press the DELETE key. The display then changes to
CREC MODE and the REC display goes off.
(2) Press the EJECT key to take out the disc.
Notes :
t. The recording start addresses of IN. MID, and OUT are
described below.
IN 30H cluster
MID 3OOH cluster
OUT 7OOH cluster
2. The DELETE key can be pressed at any time to stop the
recording.
3. An erasure prevention control is not detected in the test
mode. Be careful not to enter the continuous recording
mode using a disc containing the data that should not be
erased.
5
Do not record continuously for more than five minutes.
5. Take care that no vibration is applied during continuous
recording.
4-5 Other key functions
Function Description
> Plays back continuously when this key is pressed during
stop. Turn on and off the tracking servo when it is
pressed during conttnuous playback.
Stops the continuous playback and recording.
« The thread moves to the inner circumference while this key
is pressed.
REC INPUT Selects the mode for the pit and groove every time this key
is pressed.
REC MODE Selects the sptndle servo mode. (CLVVS and CLVVA)
TITLE INPUT Selects the contents of the display every time this key
is pressed.
Note : An erasure prevention control is not detected in the
test mode. Notice that recording is performed irrespective
of the erasure prevention control position when the REC key
is pressed.
4-6 Display in test mode
The display is selected in the order of MODE display,
address display and error rate display every time the TITLE
INPUT key is pressed.
1. MODE display
TEMP ADJUST" and CPLAY MODE" are displayed as the
MODE display.
2. Error rate display
The error rare display appears as described below.
Ct = #### AD = ##
Ct = Ct error,AD = ADIP error
3. Address display
The address display appears as described below.
h = ####. d = ####(Recordable groove and pre-mastered
disc.)
h=Header address, d=ADlP address
When no address can be read, - " display appears.
4. Segment indication
[play] mark : servo on
[pause] mark : tracking servo on
[rec] mark : servo on (laser light power)
[SINGLE] : servo groove mode
[TOTAL] : servo mode (CLV-A)
[PGM] : spindle lock
[COPY] : recordable disc