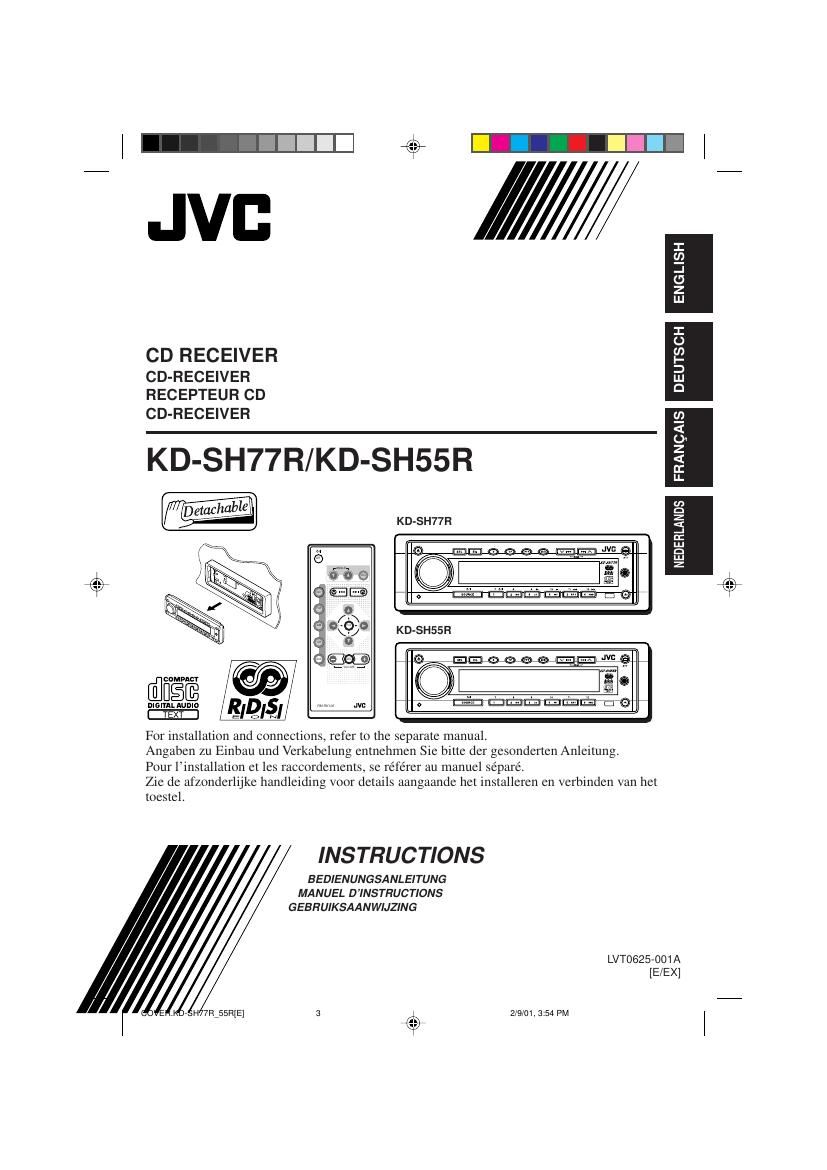
Jvc KDSH 77 R Owners Manual
This is the 384 pages manual for Jvc KDSH 77 R Owners Manual.
Read or download the pdf for free. If you want to contribute, please upload pdfs to audioservicemanuals.wetransfer.com.
Extracted text from Jvc KDSH 77 R Owners Manual (Ocr-read)
Page 1
2 ENGLISH Caution: This product contains a laser component of higher laser class than Class 1. CLASS LASER1 PRODUCT CAUTION: Invisible laser radiation when open and interlock failed or defeated. AVOID DIRECT EXPOSURE TO BEAM. (e) ADVARSEL: Usynlig laser- stråling ved åbning, når sikkerhedsafbrydere er ude af funkti on. Undgå udsæt- telse for stråling. (d) VARNING: Osynlig laser- strålning när denna del är öppnad och spärren är urkopplad. Betrakta ej strålen. (s) VA RO : Avattaessa ja suojalukitus ohitettaessa olet alttiina näkymättö- mälle lasersäteilylle. Älä katso säteeseen. (f) Position And Reproduction Of Labels IMPORTANT FOR LASER PRODUCTS Precautions: 1. CLASS 1 LASER PRODUCT 2. CAUTION: Invisible laser radiation when open and interlock failed or defeated. Avoid direct exposure to beam. 3. CAUTION: Do not open the top cover. There are no user-serviceable parts inside. Leave all servicing to qualified service personnel. 4. CAUTION: This CD player uses invisible laser radiation and is equipped with safety switches to prevent radiation emission when unloading CDs. It is dangerous to defeat the safety switches. 5. CAUTION: Use of controls, adjustments or performance of procedures other than those specified herein may result in hazardous radiation exposure. Bottom panel of the main unit CAUTION: NEVER insert your finger between the control panel and the unit, as it may get caught and hurt. (See page 28.) * Temperature inside the car....If you have parked the car for a long time in hot or cold weather, wait until the temperature in the car becomes normal before operating the unit. BEFORE USE*For safety....¥ Do not raise the volume level too much, as this will block outside sounds, making driving dangerous. ¥ Stop the car before performing any complicated operations. Note:For security reasons, a numbered ID card is provided with this unit, and the same ID number is imprinted on the unitÕs chassis. Keep the card in a safe place, as it will help the authorities to identify your unit if stolen. How to reset your unit Press the reset button on the front panel using a ball-point pen or similar tool. Name/Rating plate Note: Your preset adjustments Ð such as preset channels or sound adjustments Ð will also be erased. EN02-04.KD-SH77R/55R[E] 2/9/01, 3:54 PM 2
Page 2
3 ENGLISH CONTENTS Thank you for purchasing a JVC product. Please read all instructions carefully before operation, to ensure your complete understanding and to obtain the best possible performance from the unit. How to reset your unit ............................... 2 LOCATION OF THE BUTTONS ............ 4 Control panel ........................................... 4 Remote controller .................................... 5 Preparing the remote controller ................ 6 BASIC OPERATIONS ...................... 7 RADIO BASIC OPERATIONS ............. 8 Listening to the radio ................................ 8 Storing stations in memory ....................... 9 Tuning into a preset station ...................... 10 RDS OPERATIONS ........................ 11 What you can do with RDS EON .............. 11 Other convenient RDS functions and adjustments ........................................... 14 CD OPERATIONS .......................... 17 Playing a CD ............................................ 17 Playing a CD text ..................................... 18 Locating a track or particular portion on a CD ................................................. 18 Selecting CD playback modes .................. 19 Prohibiting CD ejection ............................. 19 SOUND ADJUSTMENTS .................. 20 Adjusting the sound ................................. 20 Selecting preset sound modes ................. 21 Storing your own sound adjustments ....... 22 OTHER MAIN FUNCTIONS ............... 23 Setting the clock ...................................... 23 Changing the general settings (PSM) ...... 23 Assigning names to the sources .............. 27 Changing the control panel angle ............. 28 Detaching the control panel ...................... 29 EXTERNAL COMPONENT OPERATIONS .. 30 Playing external components ................... 30 CD CHANGER OPERATIONS ............. 32 Playing CDs ............................................. 32 Selecting CD playback modes .................. 33 DAB TUNER OPERATIONS ............... 34 Tuning into an ensemble and one of the services ................................................. 34 Storing DAB services in memory ............. 36 Tuning into a preset DAB service ............. 37 What you can do more with DAB .............. 37 ADDITIONAL INFORMATION ............. 38 MAINTENANCE ............................ 39 Handling CDs .......................................... 39 TROUBLESHOOTING ...................... 40 SPECIFICATIONS .......................... 41 About the demonstration mode (DEMO MODE)... While shipped from the factory, ÒDEMO MODEÓ is set to ÒDEMO ONÓ in this unit. The following demonstration, introducing the main features equipped for this unit, will appear on the display automatically if no sound comes in for 3 minutes. (See page 26.) ¥ 24bit DAC : (24 bit digital-analog converter: Gives you a high quality sound after D/A conversion.) ¥ HS TUNER : (High-Sensitivity Tuner: Enables a fine reception of stations.) ¥ EQUALIZER : (Allows you to fine-adjust the sound to match your preference.) ¥ SUB WOOFER : (ONLY for KD-SH77R: Enables you to connect a subwoofer and to adjust its output level.) CAUTION on Volume Setting CDs produce very little noise compared with other sources. If the volume level is adjusted for the tuner, for example, the speakers may be damaged by the sudden increase in the output level. Therefore, lower the volume before playing a disc and adjust it as required during playback. EN02-04.KD-SH77R/55R[E] 2/9/01, 3:54 PM 3
Page 106
11 FRAN‚AIS Pour utiliser la rŽception de suivi de rŽseau, maintenez pressŽe TP (Žmission dÕinformations routires) pendant plus dÕune seconde. Chaque fois que vous maintenez la touche pressŽe, le mode de rŽception de suivi de rŽseau change comme suit: Mode 1 Le suivi de rŽseau est en service avec la rŽgionalisation rŽglŽe sur ÒŽteintÓ. Commute sur une autre station du mme rŽseau quand le signal de rŽception de la station actuelle devient faible. ¥Dans ce mode, le programme peut tre diffŽrent du programme actuellement reu. Mode 2 Le suivi de rŽseau est en service et la rŽgionalisation est rŽglŽe sur ÒallumeÓ. Commute sur une autre station du mme rŽseau et Žmettant le mme programme quand le signal de rŽception de la station actuelle devient faible. Mode 3 Le suivi de rŽseau est hors service. Remarque:Si un tuner DAB est connectŽ et que la rŽception alternŽe (pour les services DAB) est en service, la rŽception de suivi de rŽseau est aussi mise en service automatiquement. Inversement, la rŽception de suivi de rŽseau ne peut pas tre mise hors service sans mettre hors service la rŽception alternŽe. (Voir la page 37.) FONCTIONNEMENT RDS PrŽsentation du RDS EON Le RDS (Radio Data System) permet aux stations FM dÕenvoyer un signal supplŽmentaire en mme temps que les signaux de leurs programmes ordinaires. Par exemple, les stations envoient leur nom, de mme que des informations sur le type de programme quÕelle diffusent, comme par exemple du sport, de la musique, etc. Un autre avantage de la fonction RDS est appelŽ ÒEON (Enhanced Other Networks)Ó. LÕindicateur EON sÕallume lors de la rŽception dÕune station FM Žmettant des donnŽes EON. En utilisant les donnŽes EON envoyŽes dÕune station, vous pouvez accorder une station diffŽrente dÕun autre rŽseau diffusant votre programme favori ou des informations routires pendant que vous Žcoutez un autre programme ou une autre source, comme par exemple un CD. A lÕaide des donnŽes RDS quÕil reoit, cÕest appareil peut faire les choses suivantes: ¥ Localisation du mme programme automatiquement (RŽception de suivi de rŽseau) ¥ Attente de rŽception TA (Informations routires) ou votre programme favori ¥ Recherche PTY (Type de programme) ¥ Recherche de programme ¥ Et quelques autres informations routires Localisation du mme programme automatiquement (RŽception de suivi de rŽseau) Lorsque vous travaillez dans une rŽgion o la rŽception FM nÕest pas bonne, le tuner intŽgrŽ dans cet appareil accorde automatiquement une autre station RDS diffusant le mme programme mais avec un signal plus fort. De cette faon, vous pouvez continuer ˆ Žcouter le mme programme avec la meilleure rŽception possible, o que vous alliez. (Voir lÕillustration ˆ la page suivante.) Deux types de donnŽes RDS sont utilisŽs pour que la rŽception de suivi de rŽseau fonctionne correctement Ñ les donnŽes PI (Identification de programme) et AF (FrŽquence alternative). Si vous ne recevez pas ces donnŽes correctement de la station RDS que vous Žcoutez, la rŽception de suivi de rŽseau ne fonctionnera pas. Indicateur Indicateur AF REG Mode 3 Mode 2 Mode 1 : allumŽ : Žteint Indicateur REG Indicateur AF Mode 1 Mode 2 Mode 3 (AF) (AF/REG) (Annulè) FR11-16.KD-SH77R/55R[E]f 2/9/01, 9:34 PM 11
Page 138
KD-SH77R/KD-SH55R Installation/Connection Manual Einbau/Anschlu§anleitung Manuel dÕinstallation/raccordement Handleiding voor installatie/aansluiting JVC0201MNMMDWJES EN, GE, FR, NL LVT0629-001A [E/EX] ENGLISH ¥This unit is designed to operate on 12 V DC, NEGATIVE ground electrical systems. INSTALLATION (IN-DASH MOUNTING) ¥The following illustration shows a typical installation. However, you should make adjustments corresponding to your specific car. If you have any questions or require information regarding installation kits, consult your JVC IN-CAR ENTERTAINMENT dealer or a company supplying kits. DEUTSCH ¥Dieses GerŠt ist fŸr einen Betrieb in elektrischen Anlagen mit 12 V Gleichstrom und (Ð) Erdung ausgelegt. EINBAU (IM ARMATURENBRETT) ¥Die folgende Abbildung zeigt einen typischen Einbau. Dennoch mŸssen Sie entsprechend Ihrem jeweiligen Auto Anpassungen vornehmen. Bei irgendwelchen Fragen oder wenn Sie Informationen hinsichtlich des Einbausatzes brauchen, wenden Sie sich an ihren JVC AutoradiohŠndler oder ein Unternehmen das diese EinbausŠtze vertreibt. FRAN‚AIS ¥Cet appareil est conu pour fonctionner sur des sources de courant continu de 12 V ˆ masse NEGATIVE. INSTALLATION (MONTAGE DANS LE TABLEAU DE BORD) ¥LÕillustration suivante est un exemple dÕinstallation typique. Cependant, vous devezfaire les ajustements correspondant ˆ votrevoiture particulire. Si vous avez des questions ou avez besoin dÕinformation sur des kitsdÕinstallation, consulter votre revendeurdÕautoradios JVC ou une compagnie dÕapprovisionnement. NEDERLANDS ¥ Dit apparaat mag worden gebruikt bij elektrische systemen die werken op 12 V gelijkstroom met negatieve aarding. INSTALLATIE (INBOUW IN HET DASHBOARD) ¥ Op de volgende afbeelding kunt u zien hoe deinstallatie, normaal gesproken, in zijn werk gaat. U moet echter bij de installatie rekening houden met de bijzonderheden van uw eigen auto. Neem bij vragen of voor meer bijzonderheden over inbouwpakketten contact op met uw JVC car audio dealer of een dealer of een bedrijf dat inbouwpakketten levert. 53 mm (2-1/8") 184 mm (7-1/4") See ÒELECTRICAL CONNECTIONS.Ó Siehe ãELEKTRISCHE ANSCHL†SSEÒ. RŽfŽrez-vous ÒRACCORDEMENTS ELECTRIQUESÓ . Zie ÒELEKTRISCHE VERBINDINGENÓ. Dashboard Armaturenbrett Tableau de bord Dashboard 4 5 4 * 7 9 8 6 Mounting bolt Befestigungsschraube Boulon de montage Bevestigingsbout Sleeve Halterung Manchon Huis Control panel Schalttafel Panneau de commande Bedieningspaneel Trim plate Frontrahmen Plaque dÕassemblage Sierplaat Trim plate Frontrahmen Plaque dÕassemblage Sierplaat 1 2 Rubber cushion Gummipuffer Amortisseur en caoutchouc Rubberdop Handle Griff PoignŽe Hendel Lock Plate ArretierplŠttchen Plaque de verrouillage Vergrendelingsplaat Slot Schlitz Fente Sleuf Fuse Sicherung Fusible Zekering Sleeve Halterung Manchon Huis 3 Control panel Schalttafel Panneau de commande Bedieningspaneel 1 Before mounting: Press (Control Panel Release button) to detach the control panel if already attached. * When shipped from the factory, the control panel is packed in the hard case. 2 Remove the trim plate. 3 Remove the sleeve after disengaging the sleeve locks. 1 Stand the unit. Note: When you stand the unit, be careful not to damage the fuse on the rear. 2 Insert the 2 handles between the unit and the sleeve, as illustrated, to disengage the sleeve locks. 3 Remove the sleeve. Note: Be sure to keep the handles for future use after installing the unit. 4 Install the sleeve into the dashboard. * After the sleeve is correctly installed into the dashboard, bend the appropriate tabs to hold the sleeve firmly in place, as illustrated. 5 Fix the mounting bolt to the rear of the unitÕs body and place the rubber cushion over the end of the bolt. 6 Do the required electrical connections. 7 Slide the unit into the sleeve until it is locked. 8 Attach the trim plate. 9 Attach the control panel. 1 Vor dem Einbau: DrŸcken Sie(Schalttafel-Freigabetaste), um die Arretierung der Schalttafel zu lšsen, sofern diese bereits angebracht ist. * Bei der Auslieferung ab Werk ist die Schalttafel im Etui verpackt. 2 Den Frontrahmen herausnehmen. 3 Die Halterung nach dem Entriegeln der Halterungensperren abnehmen. 1 Das GerŠt aufstellen. Hinweis: Beim Aufstellen des GerŠts darauf achten, da§ die Sicherung auf der RŸckseite nicht beschŠdigt wird. 2 Die 2 Griffe zwischen dem GerŠt und der Halterung wie abgebildet einstecken und die Halterungensperren entriegeln. 3 Die Halterung entfernen. Hinweis: Sicherstellen, da§ die Griffe fŸr kŸnftigen Gebrauch nach dem Einbau des GerŠts aufbewahrt werden. 4 Die Halterung im Armaturenbrett einbauen. * Nach dem korrekten Einbau der Halterung im Armaturenbrett, die entsprechenden Riegel umknicken, um die Halterung an ihrem Platz zu sichern, siehe Abbildung. 5 Die Befestigungsschraube an der RŸckseite des GerŠtekšrpers befestigen und das Ende der Schraube mit einem Gummipuffer abdecken. 6 Nehmen Sie die erforderlichen elektrischen AnschlŸsse vor. 7 Das GerŠt in die Halterung schieben, bis es einrastet. 8 Befestigen Sie die Frontrahmen. 9 Die Schalttafel anbringen. 1 Avant le montage: Appuyer sur (dŽblocage du panneau de commande) pourŽventeullement dŽtacher le panneau decommande. * Lorsque ce panneau de commande sort dÕusine, il est rangŽ dans un Žtui de transport. 2 Retirer la plaque dÕassemblage. 3 LibŽrer les verrous du manchon et retirer le manchon. 1 Poser lÕappareil ˆ la verticale. Remarque: Lorsque vous mettez lÕappareil ˆ la verticale, faire attention de ne pas endommager le fusible situŽ sur lÕarrire. 2 InsŽrer les 2 poignŽes entre lÕappareil et lemanchon comme indiquŽ pour dŽsengagŽles verrous de manchon. 3 Retirer le manchon. Remarque: SÕassurer de garder les poignŽes pour une utilisation ultŽrieur, aprs lÕinstallation de lÕappareil. 4 Installer le manchon dans le tableau de bord. * Aprs installation correcte du manchon dans le tableau de bord, plier les bonnes pattespour maintenir fermement le manchon en place, comme montrŽ. 5 Monter le boulon de montage sur lÕarrire ducorps de lÕappareil puis passer lÕamortisseur en caoutchouc sur lÕextrŽmitŽ du boulon. 6 RŽalisez les connexions Žlectriques. 7 Faire glisser lÕappareil dans le manchon jusquÕˆ ce quÕil soit verrouillŽ. 8 Attachez la plaque dÕassemblage. 9 Remonter le panneau de commande. 1 Voordat u aan de montage van het apparaat begint: Druk op (het bedieningspaneel vrijgeven) als u het bedieningspaneel wilt loskoppelen indien dit aan de eenheid is vastgekoppeld. * Standaard wordt het bedieningspaneel bij het verlaten van de fabriek los verpakt meegeleverd. 2 Verwijder de sierplaat. 3 Verwijder het huis nadat u de klemmen hebt losgemaakt. 1 Zet het apparaat rechtop. Opmerking: Wanneer u het apparaat rechtop zet, moet u erop letten dat u de zekering aan de achterkant niet beschadigt. 2 Plaats de 2 hendels, zoals afgebeeld, tussen het apparaat en het huis, om de klemmen los te maken. 3 Verwijder het huis. Opmerking: Bewaar de hendels nadat u het apparaat hebt ge-nstalleerd, zodat u ze ook in de toekomst kunt gebruiken. 4 Installeer het huis in het dashboard. * Nadat het huis op de juiste wijze in het dashboard is geplaatst, moet u de palletjes, zoals afgebeeld, stevig op hun plaats duwen. 5 Maak de bevestigingsbout aan de achterkant van het apparaat vast en plaats de rubberdop over het uiteinde van de bout. 6 Breng de vereiste elektrische verbindingen tot stand. 7 Schuif het apparaat in het huis totdat het vergrendeld is. 8 Bevestig de sierplaat. 9 Bevestig het bedieningspaneel.
Page 198
7 ITALIANO 1 Accendere lÕapparecchio e selezionare la sorgente. Quando si preme questo pulsante per la prima volta, si accende lÕapparecchio. Quando lo si preme successivamente, la sorgente cambia come segue: * Se nello sportellino non presente un CD, non possibile selezionare CD come sorgente di riproduzione. ** Se non collegati, il sintonizzatore DAB o il CD changer non possono essere selezionati come sorgente di riproduzione. *** SOLO per KD-SH55R: Per selezionare il componente esterno, occorre modificare lÕimpostazione relativa (cfr. pag. 26). Per attivare il tuner (FM o AM), vedere pagine 8 Ð 10. Per il funzionamento del CD player, vedere pagine 17 Ð 19. Per attivare i componenti esterni (AUX INPUT e LINE INPUT) vedere pagine 30 Ð 31. Per attivare il CD changer, vedere pagine 32 Ð 33. Per attivare il tuner DAB, vedere pagine 34 Ð 37. Per aumentare il volume. OPERAZIONI BASE Per ridurre il volume. Indicazione del livello di volume 2 1 Nota: Quando si usa lÕapparecchio per la prima volta opportuno impostare lÕorologio incorporato, vedere pagina 23. Viene visualizzato il livello di volume. FM TUNER * * Per KD-SH77R CD PLAY DAB TUNER CD CHANGER LINE INPUT AUX INPUT AM TUNER ** ** ** CD CHANGER ** FM TUNER Per KD-SH55R CD PLAY DAB TUNER LINE INPUT AUX INPUT AM TUNER o*** 2 Regolare il volume. Nota:Dopo aver regolato il volume, possibile far rientrare il selettore di controllo per evitare operazioni non volute. 3 Regolare il suono al livello voluto. (Vedere pagina 20.) Riduzione immediata del volume Premere senza lasciarlo /ATT durante lÕascolto di qualsiasi sorgente. Sul display comincia a lampeggiare ÒATTÓ e il livello di volume si riduce in un attimo. Per ripristinare il livello di volume precedente, premere di nuovo il pulsante senza lasciarlo. ¥ Agendo sul selettore di comando in senso orario si ripristina anche il suono. Spegnimento dellÕapparecchio Premere senza lasciarlo SOURCE fino a visualizzare ÒSEE YOUÓ. IT07-07.KD-SH77R/55R[E]f 2/10/01, 11:39 AM 7
Page 207
16 ITALIANO Codici PTY NEWS: Notizie AFFAIRS: Programma di attualitˆ connotizie ed affari INFO: Programmi che forniscono idee e suggerimenti su una grande varietˆ di argomenti SPORT: Programmi sportivi EDUCATE: Programmi educativi DRAMA: Sceneggiati radiofonici CULTURE: Programmi di cultura nazionale o regionale SCIENCE: Programmi di scienze naturali e tecnologia VARIED: Altri programmi come commedie o cerimonie POP M: Musica pop ROCK M: Musica rock EASY M: Musica di facile ascolto LIGHT M: Musica leggera CLASSICS: Musica classica OTHER M: Altra musica WEATHER: Programmi meteorologici FINANCE: Programmi dedicati al commercio, agli affari, alla Borsa, ecc. CHILDREN: Programmi di intrattenimento per i bambini SOCIAL: Programmi su attivitˆ sociali RELIGION: Programmi che trattano dei variaspetti delle credenze e della fede, della natura dellÕesistenza e dellÕetica PHONE IN: Programmi nei quali gli ascoltatori possono esprimere le proprie opinioni, sia per telefono, sia in un ambiente pubblico TRAVEL: Programmi su destinazioni per viaggi, tour organizzati, idee e opportunitˆ di viaggio LEISURE: Programmi dedicati ad attivitˆ ricreative quali il giardinaggio, la cucina, la pesca, ecc. JAZZ: Musica jazz COUNTRY: Musica ÒcountryÓ NATION M: Musica popolare contemporanea di un altro Paese o regione, nella lingua di quel Paese OLDIES: Musica pop di tipo ÒclassicoÓ FOLK M: Musica folk DOCUMENT: Programmi dedicati ad argomenti del momento, presentati sotto forma di inchieste, o simili IT11-16.KD-SH77R/55R[E]f 2/10/01, 1:32 PM 16
Page 213
22 ITALIANO 4 Ripetere il punto 2 e 3 per regolare gli altri elementi sonori. 5 Selezionare una delle modalita sonore personalizzate (USER1, USER2, USER3). 6 Premere EQ per memorizzare le regolazioni effettuate. Per ripristinare le impostazioni di fabbrica Ripetere la stessa procedura e assegnare nuovamente i valori predisposti elencati nella tabella inserita nella pagina 38. Memorizzazione di regolazioni acustiche personalizzate é possibile regolare a piacere le modalitˆ di regolazione del suono (BEAT, SOFT, POP) e quindi memorizzarle. (USER 1, USER 2 and USER 3) ¥ Le operazioni seguenti devono essere eseguiteentro un tempo prestabilito. Se le impostazioni vengono annullate prima di aver terminato, ricominciare dal punto 1. 1 Premere EQ. Viene richiamata l'ultima modalita sonora memorizzata idonea al genere musicale. 2 Premere SEL (seleziona) per selezionare gli elementi sonori da regolare. Ogniqualvolta si preme questo pulsante, gli elementi sonori da regolare cambiano nel modo seguente: LOW FREQ. * = LOW WIDTH = LOW LEVEL = MID FREQ. * = MID WIDTH = MID LEVEL = HIGH FREQ. * = HIGH LEVEL = (ritorno all Õinizio) FREQ. (LOW, MID, HIGH) : Selezionare la fequenza centrale da regolare. WIDTH (LOW, MID) : Selezionare il livello di ampiezza di banda (Q). LEVEL (LOW, MID, HIGH) : Regolare il livello. * Premendo ¢ o 4 possibile sportarsi direttamente come segue: 3 Regolare lÕelemento sonoro selezionato. ¥ Vedere la tabella qui sotto per regolare lÕelemento sonoro selezionato. Es.: Quando si seleziona ÒUSER 2Ó Valori preimpostati LOW MID HIGH 50 Hz 700 Hz 8 kHz 80 Hz 1 kHz 12 kHz 120 Hz 2 kHz 1 (min.) 1 (min.) || 4 (max.) 2 (max.) Ð06 (min.) Ð06 (min.) Ð06 (min.) || | +06 (max.) +06 (max.) +06 (max.) LEVEL WIDTH FREQ. Indicazione Es.: Se in precedenza stato selezionao ÒPOPÓ LOW FREQ. MID FREQ. HIGH FREQ. IT20-22.KD-SH77R/55R[E]f 2/10/01, 11:43 AM 22
Page 234
53 mm (2-1/8") 184 mm (7-1/4") KD-SH77R/KD-SH55R Manual de instalaci-n/conexi-n Manuale dÕinstallazione/collegamento Installations/anslutningshandbok Asennus/liitŠntŠohjekirja JVC0201MNMMDWJES SP, IT, SW, FI LVT0640-001A [E] 45 4 * 7 9 8 6 1 2 3 ITALIANO ¥ LÕapparecchio destinato a funzionare suimpianti elettrici da 12 V CC, con massa NEGATIVA. INSTALLAZIONE (MONTAGGIO SUL CRUSCOTTO) ¥ La figura che segue rappresentaunÕinstallazione tipica. Naturalmente, sono possibili adattamenti in funzione del tipo di vettura. Per eventuali chiarimenti in merito ai kit dÕinstallazione, rivolgersi al locale rivenditore car audio JVC o a negozi analoghi. ESPA„OL ¥Esta unidad est‡ dise–ada para funcionar con 12 V de CC, con sistemas elŽctricos de masa NEGATIVA. INSTALACION (MONTAJE EN EL TABLERO DE INSTRUMENTOS) ¥La siguiente ilustraci-n muestra una instalaci-n tpica. Sin embargo usted deber‡ efectuar los ajustes correspondientes a su autom-vil. Si tiene alguna pregunta o necesita informaci-n acerca de las herramientas para instalaci-n, consulte con su concesionario de JVC de equipos de audio para autom-viles o a una compa–a que suministra tales herramientas. SVENSKA ¥ Enheten fŒr drivas av 12 V likstršmsystem med NEGATIV jordning. INSTALLATION (MONTERING I INSTRUMENTBR€DA) ¥ Illustrationen nedan visar en normal installation.Du ska emellertid gšra de anpassningar somŠr lŠmpliga fšr just din bil. Har du frŒgor, eller behšver information om installationssatser, skadu kontakta ŒterfšrsŠljaren fšr JVC BILRADIO/CD-SPELARE eller ett fšretag som sŠljer satser. SUOMI ¥ TŠmŠ laite on suunniteltu kŠytettŠvŠksi 12 V tasavirran NEGATIIVISISSA maattosŠhkšjŠrjestelmissŠ. ASENNUS (KOJELAUTAAN KIINNITYS) ¥ Alla olevista kuvista nŠkyy tyypillinen asennus. Sinun tulisi kuitenkin tehdŠ omaan autoosi sopivia sŠŠtšjŠ. Jos sinulla on kysyttŠvŠŠ tai haluat asennussarjoja koskevia tietoja, ota yhteys JVC- autohifilaitteiston jŠlleenmyyjŠŠn tai sarjoja toimittavaan yhtiššn. 1 Antes de instalar: Pulse (soltar panel de control) para separar el panel de control si ya est‡ unido. * Cuando se enva de la f‡brica, el panel de control est‡ embalado en el estuche duro. 2 Retire la placa de guarnici-n. 3 Retire la cubierta despuŽs de desenganchar los retenes de la cubierta. 1 Ponga la unidad vertical. Nota: Al poner la unidad vertical, tenga cuidado de no da–ar el fusible provisto en la parte posterior. 2 Inserte las 2 manijas entre la unidad y la cubierta tal como en la ilustraci-n y desenganche los retenes de la cubierta. 3 Retire la cubierta. Nota: DespuŽs de instalar la unidad, asegœrese de guardar las manijas para uso futuro. 4 Instale la cubierta en el tablero de instrumentos. * DespuŽs de que la cubierta estŽ correctamente instalada en el tablero de instrumentos, doble las lengŸetas correspondientes para sostener la cubierta firmemente en su lugar, tal como se muestra. 5 Fixe el perno de montaje ou la parte trasera del cuerpo de la unidad y coloque el cojn de goma sobre el extremo del perno. 6 Realice las conexiones elŽctricas requeridas. 7 Deslice la unidad dentro de la cubierta hasta que quede trabada. 8 Coloque la placa de guarnici-n. 9 Coloque el panel de control. 1 Fšre montering: Tryck pŒ (kontrollpanelfrigšring) fšr att lossa kontrollpanelen om den har satts pŒ plats. * Vid leveransen fran fabriken Šr kontrollpanelen forpac kad i den harda kapan. 2 Ta bort kantplŒten. 3 Lossa pŒ hylsspŠrrarna och ta bort hylsan. 1 StŠll enheten pŒ hšgkant. OBS: Var fšrsiktig sŒ att du inte skadar sŠkringen pŒ baksidan nŠr du stŠller enheten pŒ hšgkant. 2 Fšr in de tvŒ handtagen mellan enheten och hylsan, som pŒ bilden, fšr att lossahylsspŠrrarna. 3 Ta bort hylsan. OBS: TŠnk pŒ att spara handtagen nŠr du har installerat enheten, fšr framtida bruk. 4 Installera hylsan i instrumentbrŠdan. * NŠr hylsan sitter pŒ plats ordentligt i instrumentbrŠdan bšjer du ut tillŠmpliga flikarfšr att hŒlla hylsan pŒ plats ordentligt. Seillustrationen. 5 Skruva i monteringsbulten pŒ baksidan avenhetens kŒpa och placera gummibuffertenšver bulthuvudet. 6 Utfšr de elektriska anslutningarna. 7 Fšr in enheten i hylsan tills den lŒser fast pŒplats. 8 SŠtt fast kantplŒten. 9 SŠtt tillbaka kontrollpanelen. 1 Operazioni preliminari al montaggio: Premere (sgancio del pannello dicomando) per staccare il pannello di comando (se giˆ inserito). * Di fabbrica, il pannello di comando viene fornito in contenitore rigido. 2 Togliere la piastra di finitura. 3 Togliere la protezione dopo aver sganciato i relativi blocchi. 1 Posizionare lÕapparecchio. Nota: Nel posizionare lÕapparecchio, fare attenzione a non danneggiare il fusibile sul posteriore. 2 Inserire le 2 maniglie tra lÕapparecchio e la protezione, come illustrato per sganciare i blocchi. 3 Togliere la protezione. Nota: Una volta ultimate le operazioni dÕinstallazione, conservare le maniglie per uso futuro. 4 Installare la protezione nel cruscotto. * Verificare la correttezza dellÕinstallazione della protezione nel cruscotto, quindi piegare le linguette che tengono in posto la protezione, come illustrato. 5 Fissare il bullone di montaggio sul retro dellÕapparecchio e collocare il gommino sullÕestremitˆ del bullone stesso. 6 Eseguire i necessari collegamenti elettrici. 7 Far scorrere lÕapparecchio nella protezione finchŽ non risulta bloccato. 8 Applicare la piastra di finitura. 9 Inserire il pannello di comando. 1 Ennen asennusta: MikŠli etulevy on jo kiinnitetty, irrota se painamalla -nŠppŠintŠ (etulevyn vapautus). * Kun laite toimitetaan tehtaalta, etulevy on pakattu kovaan koteloon. 2 Irrota peitelevy. 3 Irrota vaippa avattuasi ensin vaipan lukot. 1Pane laite pystyyn. Huom! Kun panet laitteen seisomaan, varo vahingoittamasta takana olevaa varoketta. 2 Aseta molemmat kahvat laitteen ja vaipan vŠliin kuvasta nŠkyvŠllŠ tavalla avataksesi vaipan lukot. 3 Irrota vaippa. Huom! PidŠ kahvat tallessa laitteen asennuksen jŠlkeen tulevan kŠytšn varalta. 4 Asenna vaippa kojelautaan. * Kun vaippa on asennettu oikein kojelautaan, taivuta asianmukaiset salvat, jotka pitŠvŠt vaipan tukevasti paikoillaan, kuvasta nŠkyvŠllŠ tavalla. 5 KiinnitŠ kiinnityspultti laitteen rungon takaosaan ja pane kumityyny pultin pŠŠhŠn. 6 Tee tarpeelliset sŠhkšliitŠnnŠt. 7 TyšnnŠ laite vaippaan, kunnes se lukkiutuu. 8 KiinnitŠ peitelevy. 9 KiinnitŠ etulevy. Panel de control Panello di comando Kontrollpanelen Etulevyn Placa de guarnici-n Piastra di finitura KantplŒt Peitelevy Perno de montaje Bullone di montaggio Monteringsbult Kiinnityspultti Placa de guarnici-n Piastra di finitura KantplŒt Peitelevy Ranura Feritoia SkŒra Aukko Fusible Fusibile SŠkring Va r o k e Cubierta Protezione Hylsa Vaippa Placa de bloqueo Piastra di bloccaggio LŒsplatta Lukkolevy Manija Maniglia Handtag Kahva Panel de control Panello di comando Kontrollpanelen Etulevyn Cubierta Protezione Hylsa Vaippa Cojn de goma Gommino Gummibuffert Kumityyny VŽase ÒCONEXIONES ELECTRICASÓ. Vedere ÒCOLLEGAMENTI ELETTRICIÓ. Se ÒELANSLUTNINGARÓ. Ks. ÒS€HK…LIIT€NN€TÓ.Tablero de instrumentos Cruscotto InstrumentbrŠda Kojelauta
Page 258
19 NEDERLANDS Afspeelmodus selecteren Tracks in willekeurige volgorde afspelen (Random Play) 1Druk op de toets M/B (modus/omroepband) om de functiemodus te activeren terwijl u een CD afspeelt. De eenheid schakelt over op de functiemodus. 2 Druk op de toets RND (random) terwijl de functiemodus nog is geactiveerd, zodat de indicator RND op de display aangaat. Vervolgens zal elke keer wanneer u op deze toets drukt, de willekeurige afspeelmodus voor CDÕs worden in- of uitgeschakeld. Wanneer deze functie is ingeschakeld, licht de indicator RND op de display op en wordt er een willekeurige track afgespeeld. Tracks herhaaldelijk afspelen (Repeat Play) 1 Druk op de toets M/B (modus/omroepband) om de functiemodus te activeren terwijl u een CD afspeelt. De eenheid schakelt over op de functiemodus. 2 Druk op de toets RPT (repeat) terwijl de functiemodus nog is geactiveerd, zodat de indicator RPT op de display aangaat. Vervolgens zal elke keer wanneer u op deze toets drukt, de herhaald afspeelmodus voor CDÕs worden in- of uitgeschakeld. Tracks herhaaldelijk afspelen (Intro scan) Het is mogelijk om van alle tracks alleen de eerste 15 seconden af te spelen, zodat u de introÕs kunt beluisteren. 1 Druk op de toets M/B (modus/omroepband) om de functiemodus te activeren terwijl u een CD afspeelt. De eenheid schakelt over op de functiemodus. 2Druk op de toets INT (intro scan) terwijl de functiemodus nog is geactiveerd, zodat de vermelding ÒINTROÓ op de display wordt weergegeven. Vervolgens zal elke keer wanneer u op deze toets drukt, de introscanmodus voor CDÕs worden in- of uitgeschakeld. 4 Nummer van het muziekstuk dat wordt afgespeeld Voorkomen dat de CD terugspringt U kunt voorkomen dat de CD uit de lade springt door deze in de lade te vergrendelen. Druk wanneer u op de toets SEL (selecteren), drukt tevens op de toets 0 en houd de toetsen gedurende minimaal 2 seconden ingedrukt. De vermelding ÒNO EJECTÓ zal gedurende circa 5 seconden op de display knipperen en de CD wordt vergrendeld. De CD kan nu niet meer uit de laadopening worden gehaald. Opmerking:Als u op de toets 0 drukt terwijl het uitwerpen van CDÕs niet is toegestaan, komt het bedieningspaneel weliswaar naar beneden geschoven, maar kan er geen CD worden uitgenomen. Druk op de toets 0 als u het bedieningspaneel naar de vorige positie wilt laten terugkeren. Als u de vergrendeling ongedaan wilt maken en de CD weer toegankelijk wilt maken, moet u de toets 0 gedurende minimaal 2 seconden ingedrukt houden terwijl u op de toets SEL drukt. Vervolgens knippert de vermelding ÒEJECT OKÓ gedurende circa 5 seconden op de display. De laadopening is nu ontgrendeld en de CD is weer toegankelijk. NL17-19.KD-SH77R/55R[E]f 2/9/01, 10:02 PM 19
Page 322
35 ESPA„OL 3 Comience a buscar un ÒensembleÓ. Cuando se reciba un ÒensembleÓ, la bœsqueda cesa. Para cesar la bœsqueda antes que se reciba un ÒensembleÓ, pulse el mismo bot-n que el pulsado para la bœsqueda. 4 Seleccione el servicio que desea escuchar. 1Pulse M/B (modo/banda). 2 Pulse ¢ o 4 para seleccionar el servicio que desea. Pulse 4 para buscar ÒensemblesÓ de frecuencias m‡s bajas. Para cambiar la informaci-n visualizada mientras se sintoniza un Òensemble Ó Normalmente el nombre del servicio se visualiza en la indicaci-n. Si desea cambiar la informaci-n de la indicaci-n, pulse D (indicaci-n). Cada vez que pulsa el bot-n, aparecer‡ la siguiente informaci-n durante algœn tiempo en la indicaci-n. Para sintonizar un determinado ÒensembleÓ sin efectuar la bœsqueda: 1Pulse SOURCE para seleccionar el sintonizador DAB como fuente. 2 Puse y mantenga pulsado M/B (modo/banda) durante m‡s de 1 segundo de forma repetida, para seleccionar la banda DAB (DAB 1, DAB 2 o DAB 3). 3 Pulse y mantenga pulsado ¢ o 4 durante m‡s de 1 segundo. ÒMANUALÓ parpadea en la indicaci-n. 4 Pulse ¢ o 4 repetidas veces hasta llegar al ÒensembleÓ deseado. ¥ Si mantiene pulsado el bot-n, los ensembles siguen cambiando hasta que suelte el bot-n. Pulse ¢ para buscar ÒensemblesÓ de frecuencias m‡s altas. En menos de 5 segundos Nombre del ensemble Nombre del servicio N˚ de canal Frecuencia SP34-37.KD-SH77R/55R[E]f 2/9/01, 10:06 PM 35