Anatek pocket pedal operating instructions

This is the 1 pages manual for anatek pocket pedal operating instructions.
Read or download the pdf for free. If you want to contribute, please mail your pdfs to info@audioservicemanuals.com.

Page: 1 / 1
left
anatek pocket pedal operating instructions

Extracted text from anatek pocket pedal operating instructions (Ocr-read)


Page 1

Pocket PEDALTM

OPERATING INSTRUCTIONS

Pocket PE DA L" can be used with most foot controllers or volume pedals to generate and send various typesol MIDI controller data at any point in a MIDI line. It can
be used with any type of MIDI equipment and reun no batteries or external power supply to operate.

1. SENDING DATA ON MIDI CHANNEL I (default channel).
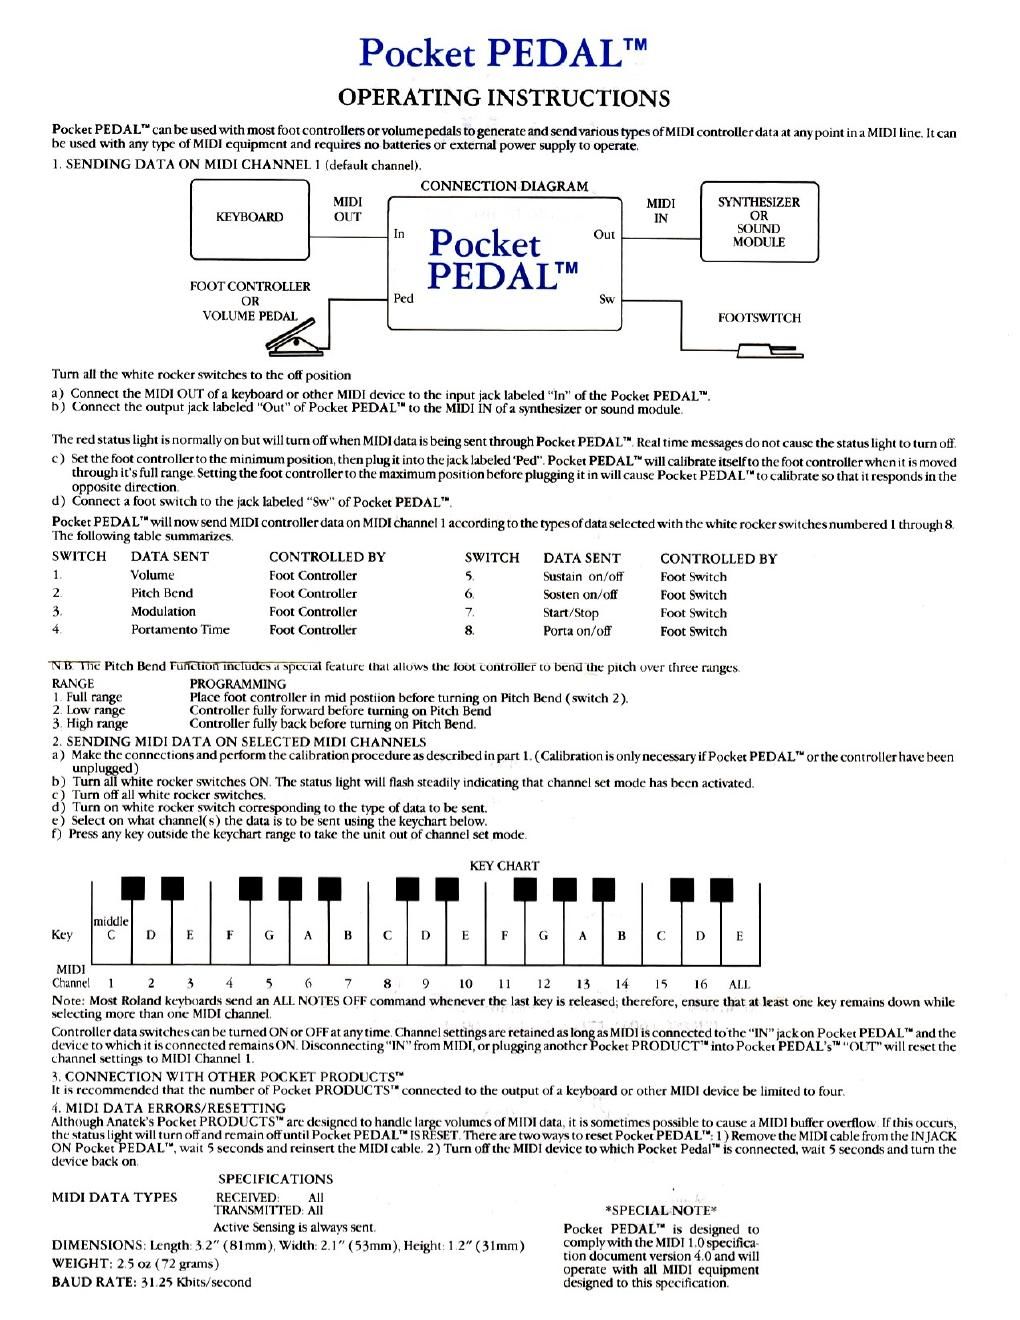
CONNECTION DIAGRAM

Pocket
FOOTCONTROLIER d P EDALTM

QR Pe

MIDI
KEYBOARD OUT

Sw
VOLUME PEDAL FOOTSWITCH

Turn all the white rocker switches to the OE position

a) Connect the MIDI OUT of a keyboard or other MIDI device to the input jack labeled In" of the Pocket PEDAL".
h) Connect the output jack labeled Out" of Pocket PEDAL" to the MIDI [N of a synthesizer or sound module

The red status light is normally on but will turn oifwhen MIDI data is being sent through Pocket PEDAL" Real time messages do not cause the status light to turn olf

c) Set the foot controller to the minimum position. then plug it into the jack labeled Ped". Pocket PEDA L will calibrate itselfto the foot controllerwhen it is moved
through it's full range Setting the foot controller to the maximum position before plugging it in will cause Pocket PEDAL" to calibrate so that it responds in the
opposite direction.

d) Connect a foot switch to the jack labeled SW of Pocket PEDAL".

Pocket PEDAL" will now send MIDI controllerdata on MIDI channel I according tothe typesofdata selectedwith the white rocker switches numbered 1 through 8.
The following table summarizes.

SWITCH DATA SENT CONTROLLED BY SWITCH DATA SENT CONTROLLED BY
1 Volume I-oot Controller 5 Sustain on/otf Foot Switch
2. Pitch Bend Foot Controller 6 Sosten on/ol! Foot Switch
5 Modulation Foot Controller 7 Start/ Stop Foot Switch
4 Ponamento Time Foot Controller 8. Porta on/ofl Foot Switch

N B l J Pitch Bend Ififlkllufl' lficlufles .i spetiil feature tlial allows the loot controller to bend Ihc pitch over three ranges
RANGE PROGRAMMING

l Full range Place foot controller in mid postiion before tuming on Pitch Bend (switch 2).
2. Low range Controller hilly forward before turning on Pitch Bend
:5 High range Controller fully back before turning on Pitch Bend.

2. SENDING MIDI DATA ON SELECTED MIDI CHANNELS

a) Make the connections and perform the callbiatlon procedure as described in pan l (Calibration is only necessary if Pocket PEDAL" or the controller have been
un lu ed)

M Tuiin III white rocker switches ON. The status light will flash steadily indicating that channel set mode has been activated.

c) Turn 03 all white rocker switches

d) Turn on white rocker switch corresponding to the type of data to be sent.

e) Select on what channel(s) the data is to be sent using the keychan below.

I) Press any key outside the keychan nnge to take the unit out of channel set mode

KEY CHART

MIDI
Channel I 2 I0 II l2 III I4 I6 ALI.

Note: Most Roland keyboards send an ALL NOTES OFF command whenever the last key is released; therefore. ensure that at least one key remains down while
selecting more than one MIDI channel.

Controller data switches can he turned ON or OFF at any time. Channel settings are retained as Ion as MIDI isconnected to'the "IN jack on Pocket PEDAL" and the
device to which it is connected remains 0N. I)isconnectinglN" from MIDI. orpluggitig another oeket PRODUCT" into Pocket PEDAL's" OUT will reset the
channel settings to MIDI Channel I

i. CONNECTION WITH OTHER POCKET PRODUCTS"

II is recommended that the number of Pocket PRODUCTS" connected to the output of a keyboard or other MIDI device be limited to four.

4. MIDI DATA ERRORS/RESETTING

Although Anatek's Pocket PRODUCTS" are designed to handle large volumes of MIDI data. it is sometimes possible to cause a MIDI bufler overflow If this occurs,
the status light will turn tifiand remain ofluntil Pocket PEDAL" IS RESET. There are two ways to reset Pocket PEDA L": I ) Remove the MIDI cable from the INJACK
ON Pocket PEDAL", wait 5 seconds and reinsert the MIDI cable 2 ) Turn ofithe MIDI device to which Pocket Pedal" is connected. wait 5 seconds and turn the
device back on

SPECIFICATIONS
MIDI DATA TYPES RECEIVED: All

TRANSMITTED: All 'SPECIAI. Norm

Active Sensing is always sent Pocket PEDAL" is designed to
DIMENSIONS: [Lnglh 5 2" (81mm ). Width. 2. I " (53mm ). Height. I 2" ( 3 lmm) complywith 1hr MIDI | Owecifim-

tion document version 4.0 and will
WEIGHT: 2.5 ()2 (72 grams) operate with all MIDI equipment
BAUD RATE: 51.25 Khits/second designed to this specification