Acurus a 250 owners manual

This is the 2 pages manual for acurus a 250 owners manual.
Read or download the pdf for free. If you want to contribute, please upload pdfs to audioservicemanuals.wetransfer.com.

Page: 1 / 2
acurus a 250 owners manual

Extracted text from acurus a 250 owners manual (Ocr-read)


Page 1

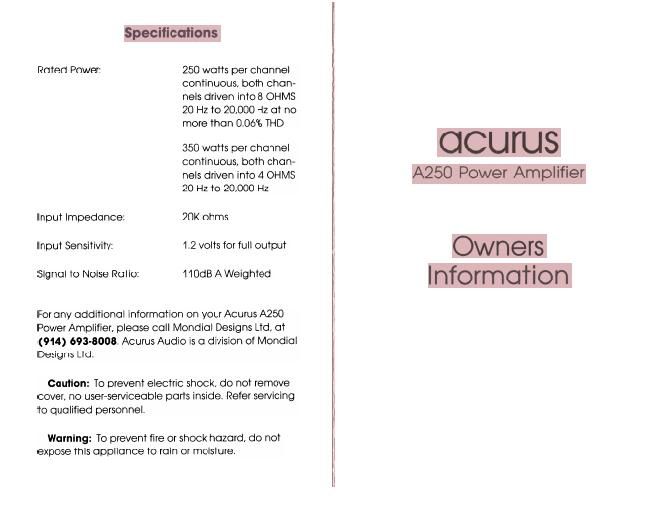
Specifications

Rated Power: 250 watts per channel
continuous, both chan-
nels driven into 8 OHMS
20 Hz to 20,000 Hz at no
more than 0.06% THD

350 watts per channel 1 0 CU J S

continuous, both chan-

nels driven into 4 OHMS 1 A250 Power Amplifier
20 Hz to 20,000 HZ

Input Impedance: 20K ohms

Input Sensitivity: 1.2 volts for full output ; own erS
Signal to Noise Ratio: 1 10dB A Weighted I nfOrmO'fi O n

For any additional information on your Acurus A250
Power Amplifier, please call Mondiol Designs Ltd, at
(914) 693-8008. Acurus Audio is a division of Mondial
Designs Ltd.

Caution: To prevent electric shock, do not remove
cover, no usereserviceable parts inside. Refer servicing i
to qualified personnel. l

Warning: To prevent fire or shock hazard, do not i
expose this appliance to rain or moisture.

Page 2

Acurus A250 Power Amplifier

Please read this manual. Upon completion you will
understand the set-up and operation of your A250
Power Amplifier.

1 . Although all Acurus components are burnt-in prior
to delivery, it has been our experience that the amplifi-
ers continue to improve during the first 250 hours of use.

2. Although all Acurus amplifiers contain comprehen-
sive protection circuitry, they still may be damaged due
to misuse. Therefore please use the following basic
safety precautions:

A) Allow adequate ventilation on all sides of the
Acurus amplifiers. Never place directly on carpeted
floor.

B) NEVER attach or remove speaker cables or input
cables with the amplifier on.

3. Remove power cord from wall outlet when chang-
ing fuses.

4. Do not use an extension cord - connect the
amplifier directly to your A.C. wall outlet. The Acurus is
capable of delivering tremendous power to your
speakers, but not if its ability to receive A.C. current is
constricted in any way. If you must use an extension
cord 14 gauge wiring is minimum.

5. Be very careful with the placement of a_ll your
systems wiring. Many times placement of wiring will
alter the amount of background noise or hum that is
audible.

6. Connections

INPUT - Connect your preamplifiers outputs to
the appropriate input jack on the rear panei. Be-
fore inserting or removing any connectors be cer-
tain both the preamp and power amp are OFF.

OUTPUT - Connect the outputs to the appropriate
inputs of your speakers.